In the last week or so, my pals Jelly and Ste have posted about their small but very important roles in the creation of Callsheet.
First, Jelly writes:
I was listening to Accidental Tech Podcast one day, and my good mate Casey Liss was chatting away about his upcoming app, Flookup. […] So I found myself opening up Sketch and getting to work. Could I make an icon before the episode was done?
Jelly’s post also outs my piss-poor rendition of the icon that he ended up making so very pretty.
Next, Ste writes:
Fast forward to the WWDC keynote in early June, where they briefly discussed the Vision Pro. At one point, they flashed a large set of app icons on the screen. […] An icon that I created appeared (if ever so briefly) in the WWDC keynote. Achievement unlocked!
Callsheet would look — and feel — very different without the efforts of these two incredible friends. 🥰
Today, the folks over at Sketch — the incredible design/prototyping platform that is the industry-standard — published an interview with myself and design guru Ben McCarthy.
Freddie asked some really great questions, which had me revisiting some of the decisions that I made — as well as ones Ben and I made together — while Callsheet was being built. This led to some fun realizations, like me distilling what makes indie software development so great:
It’s stuff like this that I think makes all indie software so fun — I doubt you’ll see an actor’s height front-and-center on IMDb, but I can make the choice to do it in Callsheet and have nobody to stop me.
Appearing on Sketch’s blog is an immense honor. It was Ben’s designs that got us there, but I like to think it was my execution that sealed the deal. I’m so pleased and proud that our work was featured there, and so thankful to Ben for helping me make Callsheet quite a bit better.
If you want help making your app that much better, Ben is available for design consulting!
During the pandemic, everyone seemed to come up with something wasteful
dumb frivolous to spend time on. For a ton of people, it was sourdough.
For me, it was an extraordinarily convoluted garage door alert system. To
each their own.
Growing up, my dad always had a project — no once-in-a-hundred-years pandemic required. As a former professional mechanic, that project was often a car. But he went through phases: an audiophile’s stereo system, refurbishing pinball machines, an absolute obsession over his diet, wiring the house for ethernet in the mid-90s, and so on.
I think my acorn didn’t fall far from the tree. While I don’t need a project in the same way he does, I do find myself working on something silly from time to time. Often with a dedication that is borderline obsessive.
This year, that project has been the Tailgate Tub™.
Well over a decade ago, I decided to get my wife Erin (and me) season tickets
to UVA football. The UVA campus grounds are about an hour from
home, which makes a day trip for a football game far easier than it is for
my alma mater. I thought we’d do it for the year, and that would be that.
As it turns out, we’ve been season ticket holders for over ten years now. Oops.
Over the years, our tailgates have changed considerably. Led by our dear friend Brian, our beginnings were humble. A folding table, an orange and blue Jambox, and some food. Shortly, Brian got a grill, and his ability to cook in a parking lot progressed from basics to genuinely impressive fare. Several years back, Brian decided to really up our game, and we transitioned from amateur level to professional: he bought a generator. His generator, and our TV, and suddenly this tailgate became pretty serious business.
For several years, the combination of the TV and an over-the-air antenna were more than enough. Eventually, particularly after a long stretch of noon games, we realized we wanted to be able to watch things that weren’t carried over-the-air; most especially, ESPN.
Last year, thanks in part to our desire for access to more TV channels, the tailgate got a bit out of control. Really, it’s all Quinn’s fault. But I’m getting ahead of myself.
After realizing we’d really prefer to have access to the whole of cable TV, it occurred to me that this is actually quite workable. At home, we watch TV using the incredible Channels app. Channels works in concert with my HDHomeRun to replace my cable box with an app. An app that works on my Apple TV, iPhone, and [cellular] iPad. In combination with a hilariously expensive dongle, we could watch our home’s cable on the tailgate TV, via the iPad or iPhone.
But we also need music.
Yes, we could just use a bluetooth speaker, but that’s not as refined as it could be. And further, it requires someone’s phone to play the music. And drain its battery. Isn’t there a better way?
Enter Quinn Nelson. This video of his absolutely incepted me, and within minutes of finishing it, I had a travel router on order. This travel router is capable of slurping up internet from ethernet, as you’d expect, but it can also rebroadcast a wireless connection (useful for hotels), or tether to an iPhone/iPad/MiFi and share that connection. It occurred to me that if I set the travel router to have the same SSID and password as home, all my devices would think they’re at home and be completely content. Including my Sonos Move. Thus, it can handle music playback entirely on its own, no phone involved. Solid.
But wait — there’s more! If I already have a travel router at our tailgate, that means I have Wi-Fi and ethernet available for use. That means that it’d be trivial to add an Apple TV to the mix. Which would have the advantage of letting me change the channel via remote control, rather than having to get up and tap around on the iPad or iPhone connected to the TV. Win/win.
So, as of the end of 2023, our tailgate now includes the following:
- Generator
- Television
- Travel router
- Apple TV
- Sonos Move
This is pretty great, but it’s a lot of cabling. Cabling that needs to get set up and torn down every time we’re at a tailgate.
Could we do better?
Yes. We can do better.
During this off-season, I self-assigned a new project: The Tailgate Tub™.
It seemed to me that the connections are consistent each week:
- Router ↔ iPhone (or iPad) for internet[1]
- Router ↔ AppleTV via ethernet
- Power → router
- Power → AppleTV
- Power → TV
A lot of this could be handled in advance, if I can transport everything as a unit. What if I could put most of this inside a portable box/tub of some sort, and take the tub to/from tailgates? After a bit of planning, I landed on this wiring diagram:
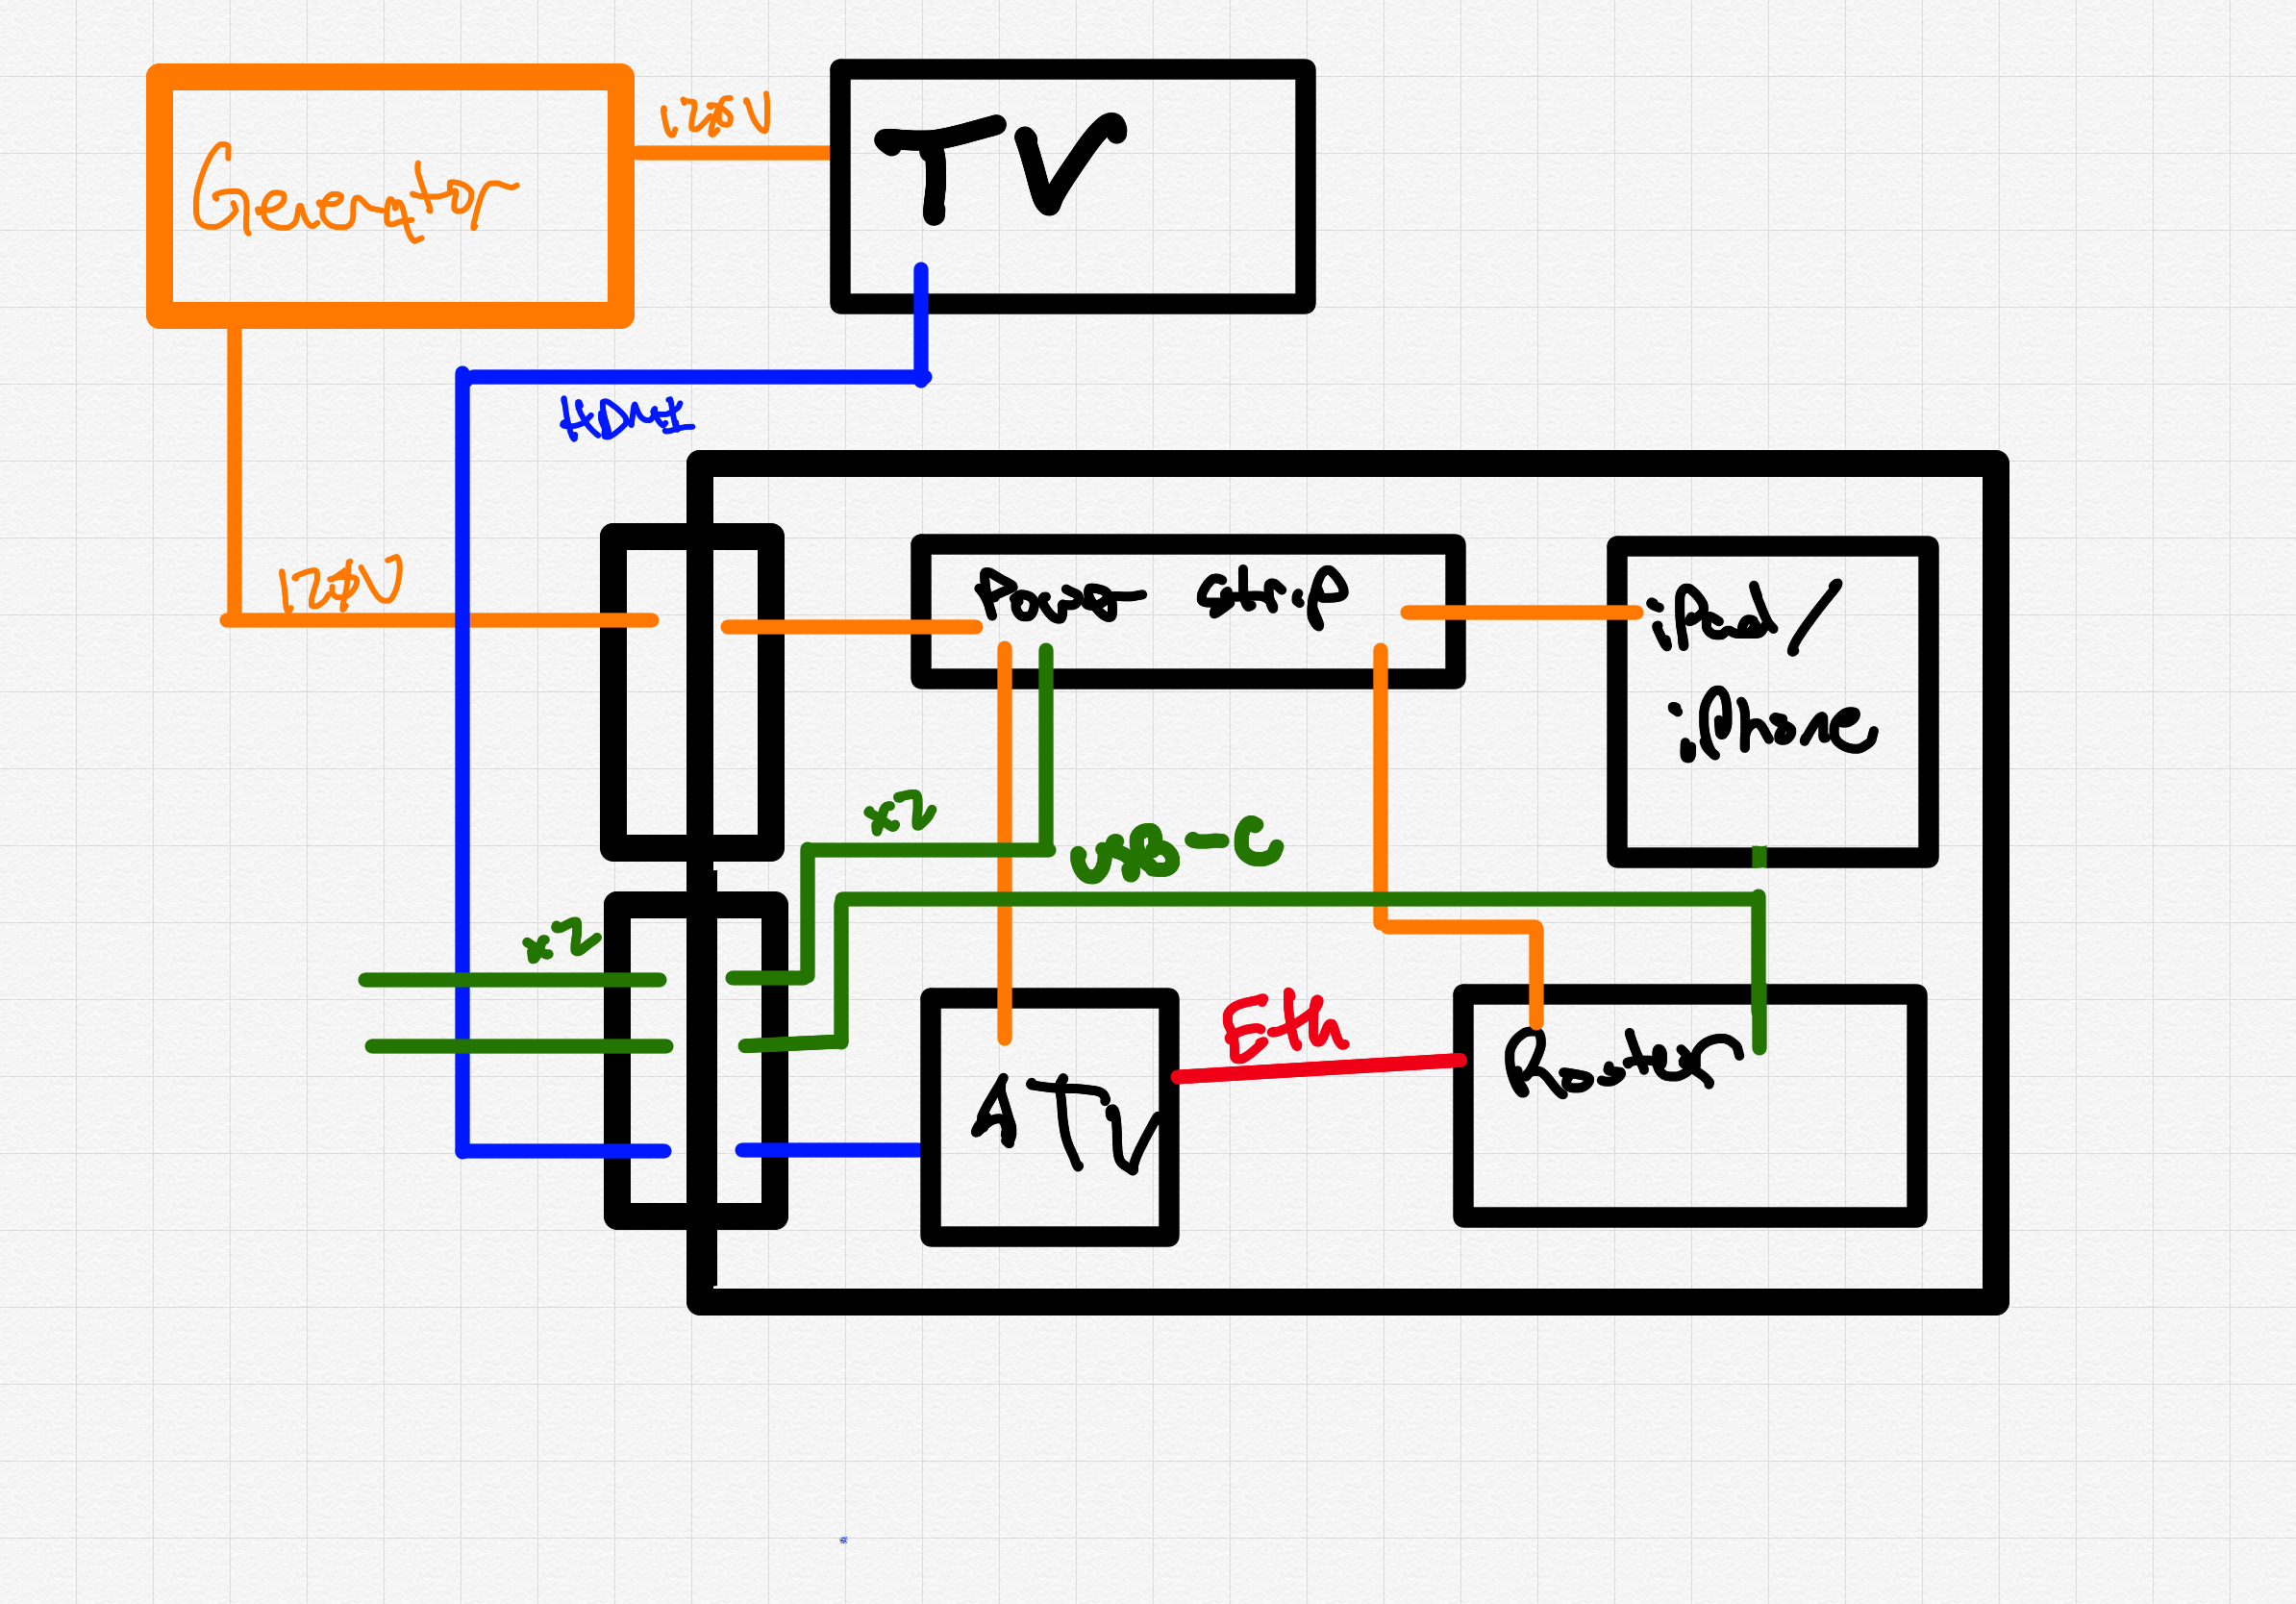
Something like the above should work.
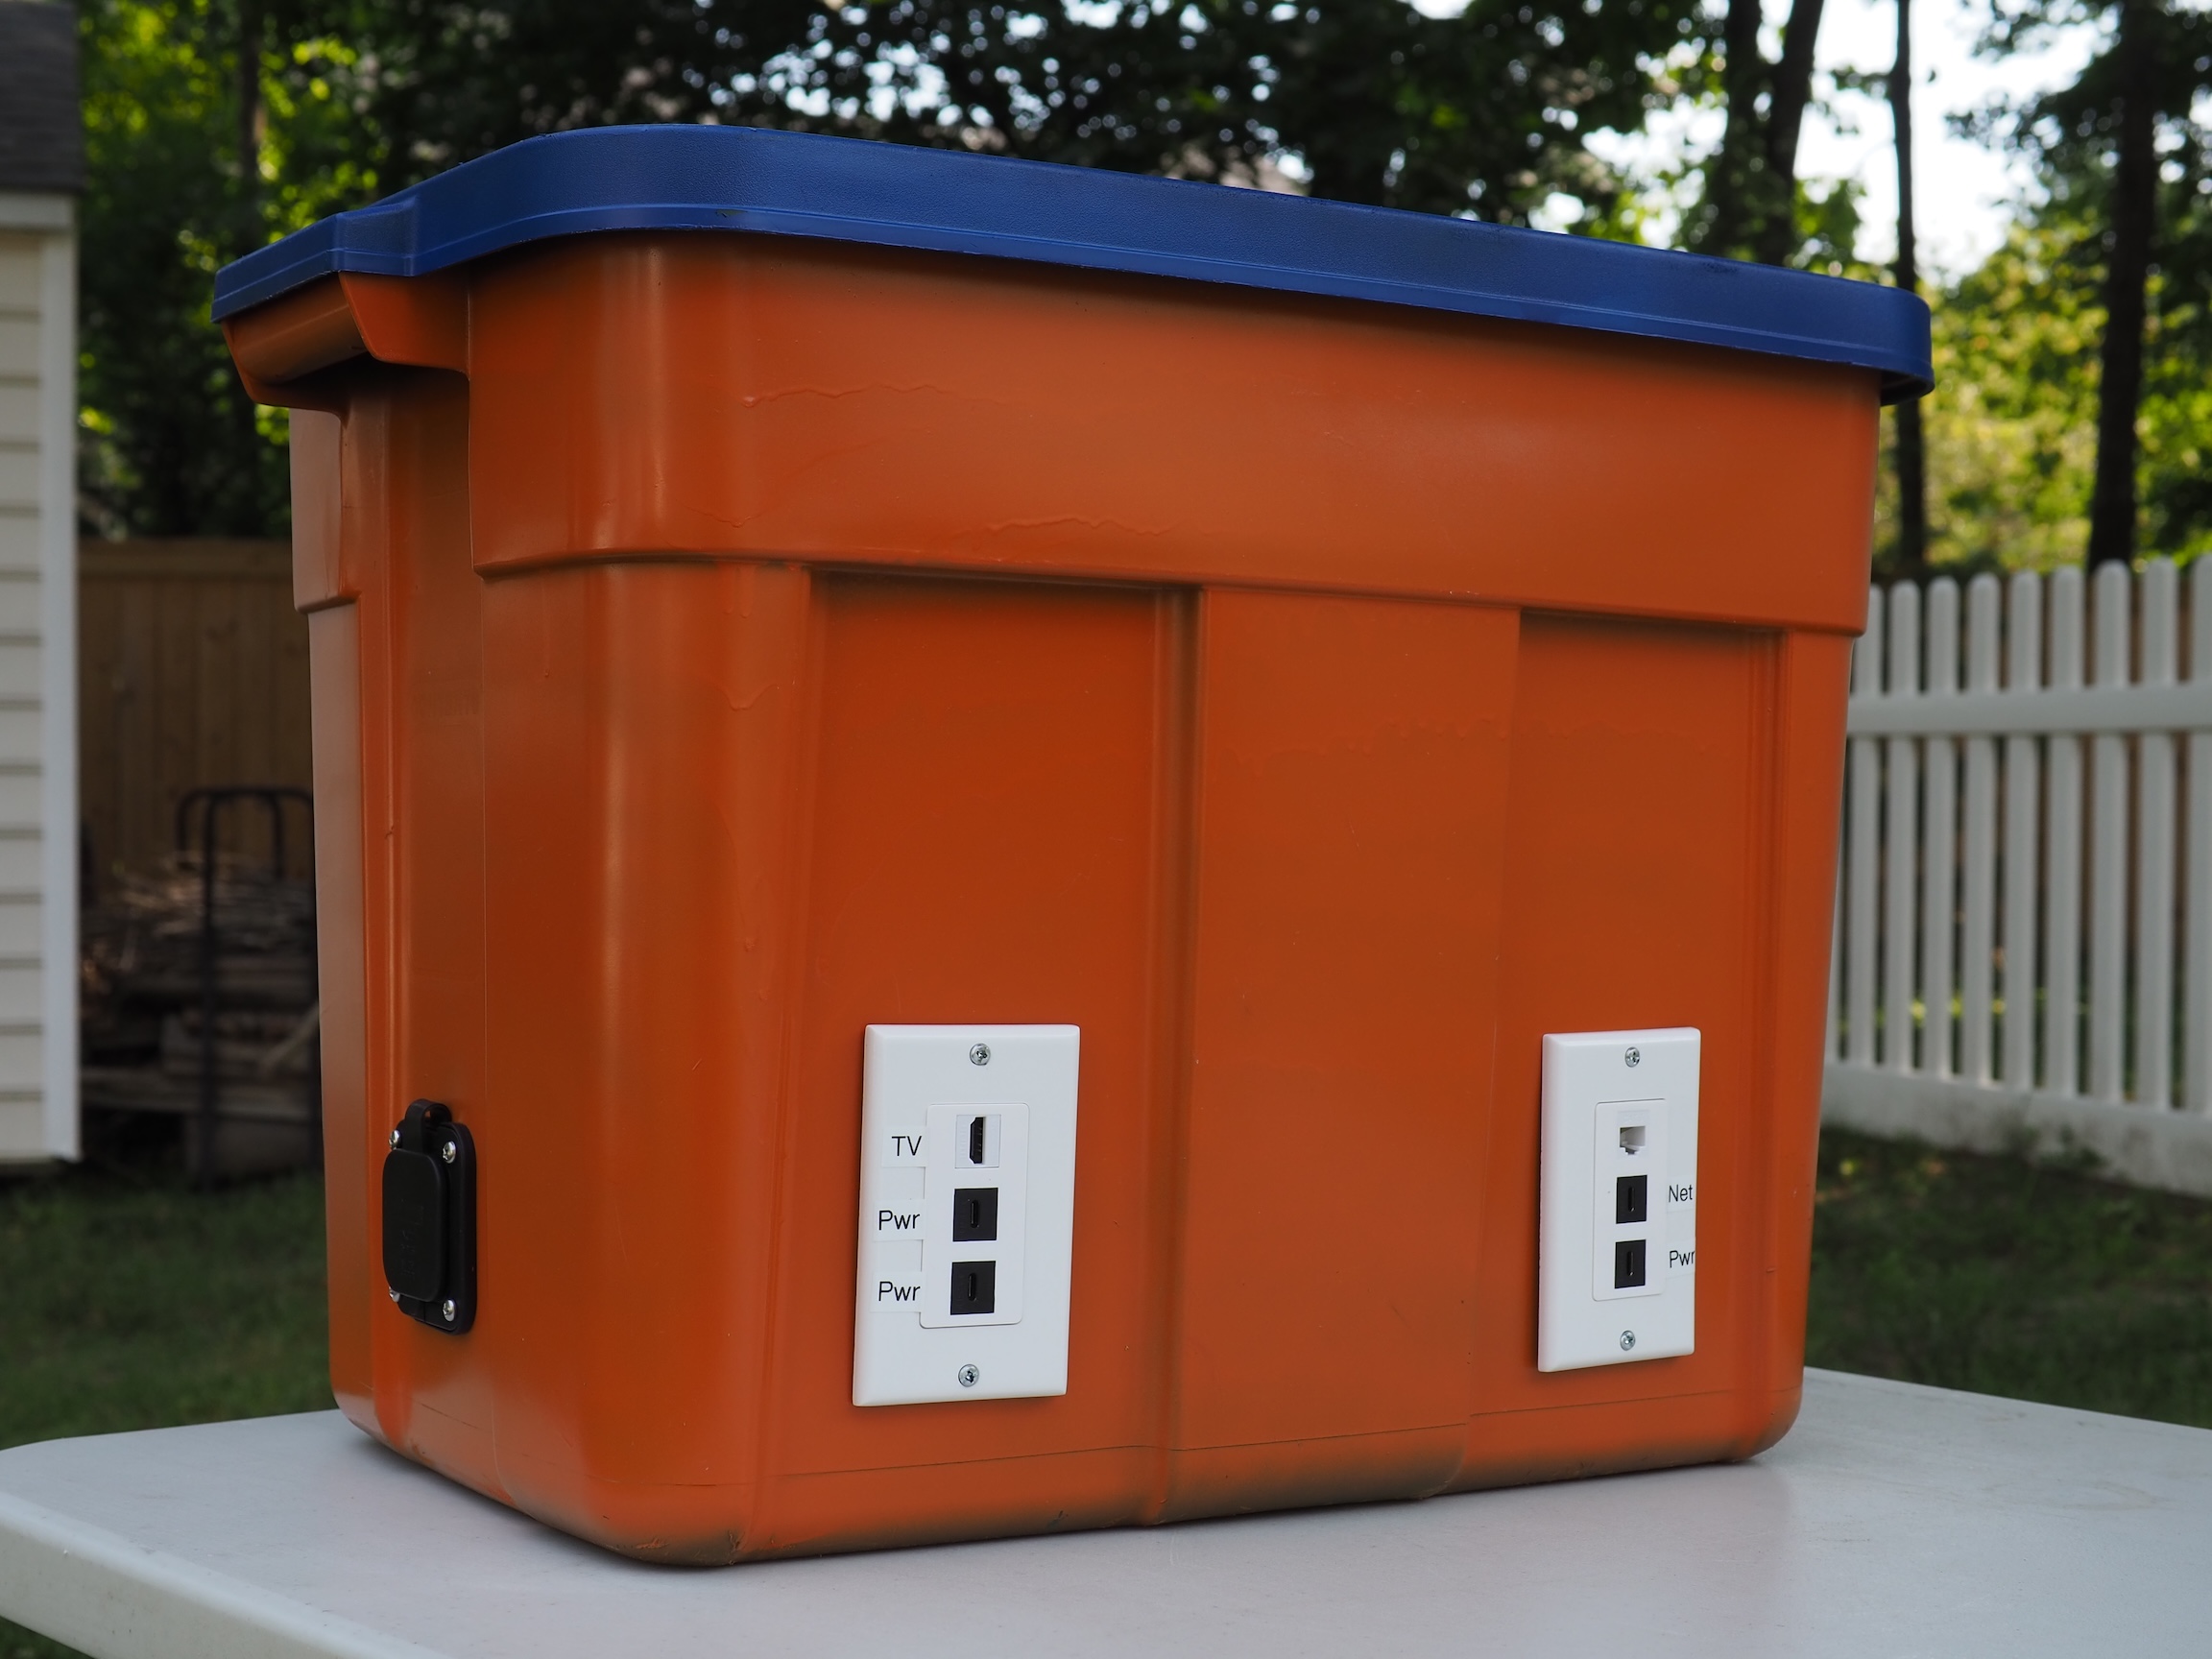
So this — my Tailgate Tub — has been my project for the football off-season. The Tailgate Tub is a portable container that has most of the electronics we need wired internally, with convenient connections for everything else externally. A combination of some keystone jacks and single-gang faceplates could get the low-voltage connections sorted. A marine inlet could handle the high-voltage.
I figured a couple of one-gang three-keystone “outlets” would do the trick:
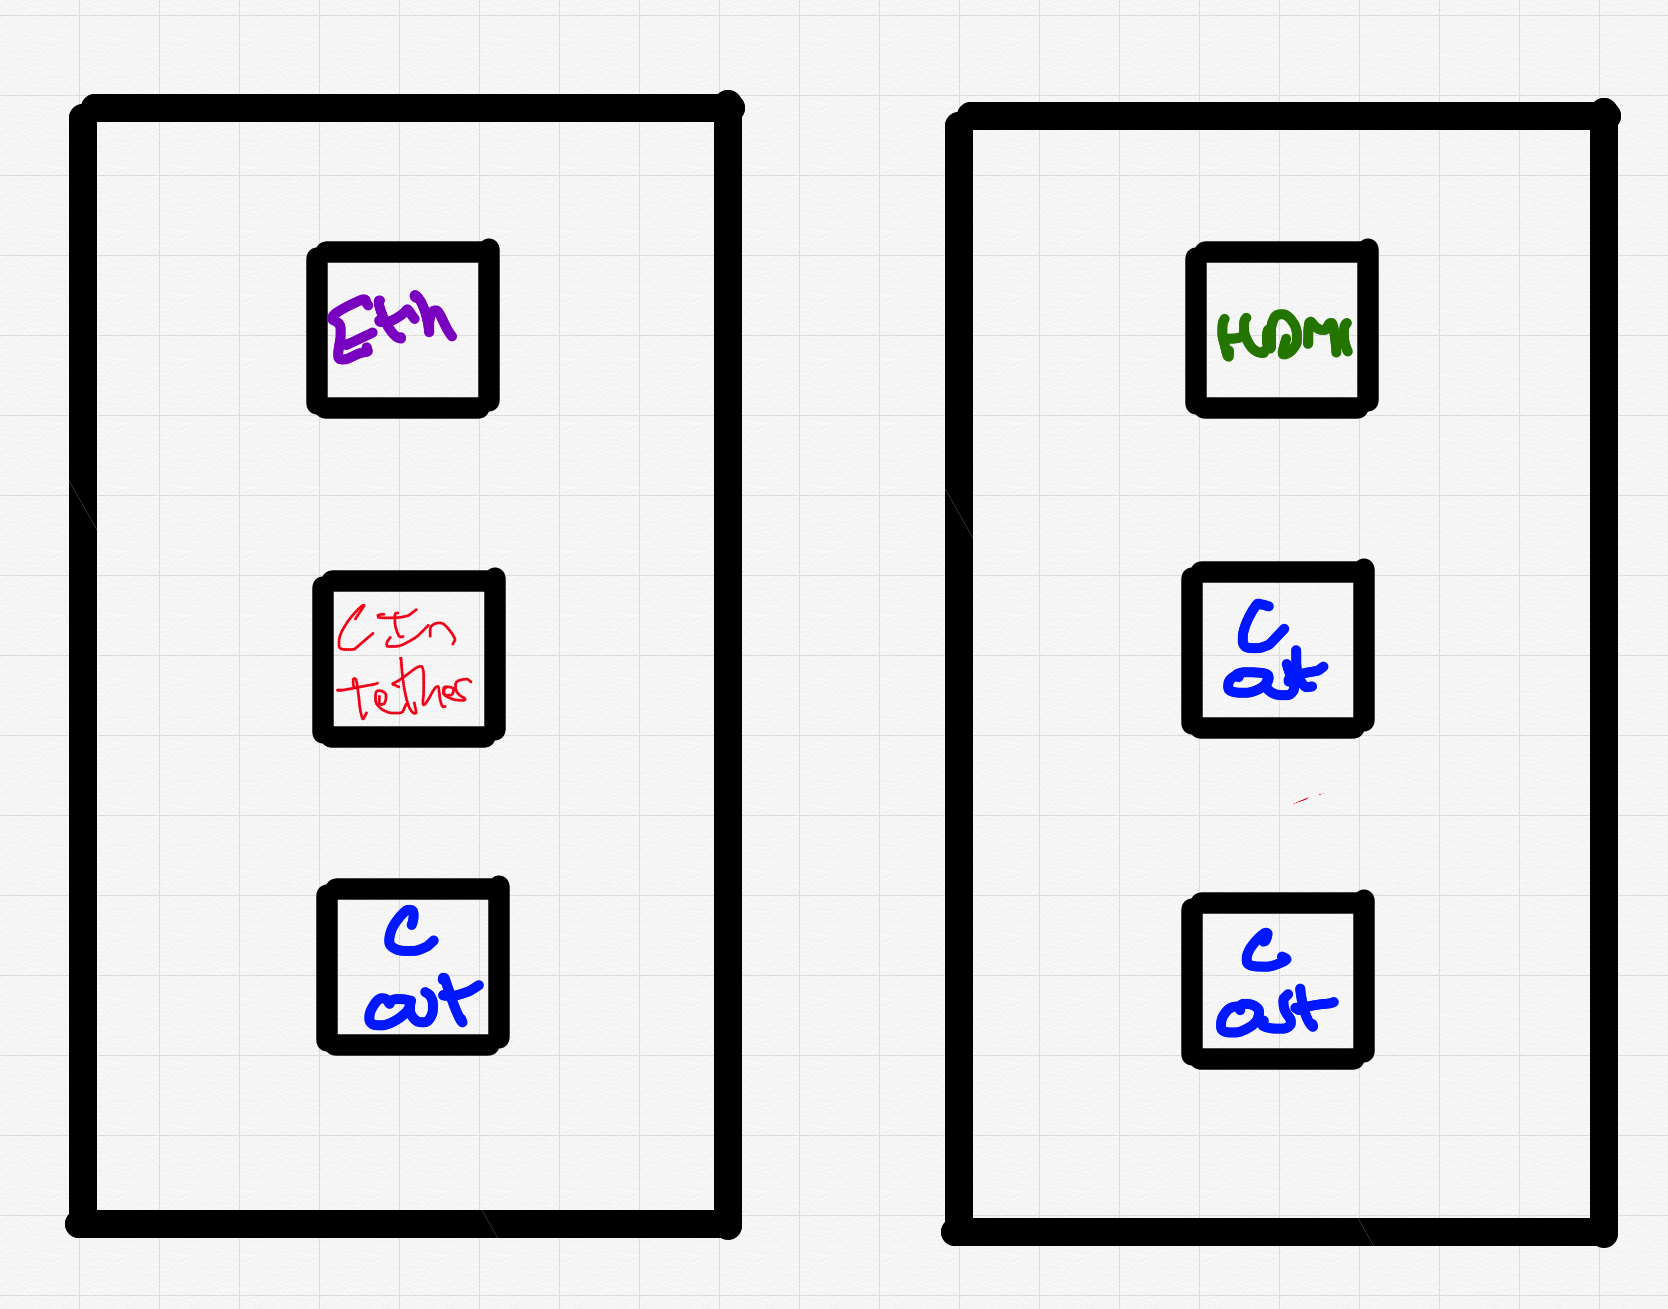
The two keystone panels are in service of:
- Ethernet, in case I need to connect an iPad/Mac for diagnostic purposes
This will almost certainly not happen at a tailgate but will be convenient at home - USB-C in, which would be connected to the travel router, to provide internet
- HDMI, which would be connected to the TV, and internally would be driven by the Apple TV
- 3× USB-C power for charging devices if necessary
These are driven by a USB-C charging “block” and can easily be connected to a USB-C phone, or an older iPhone using a USB-C ↔ Lightning cable
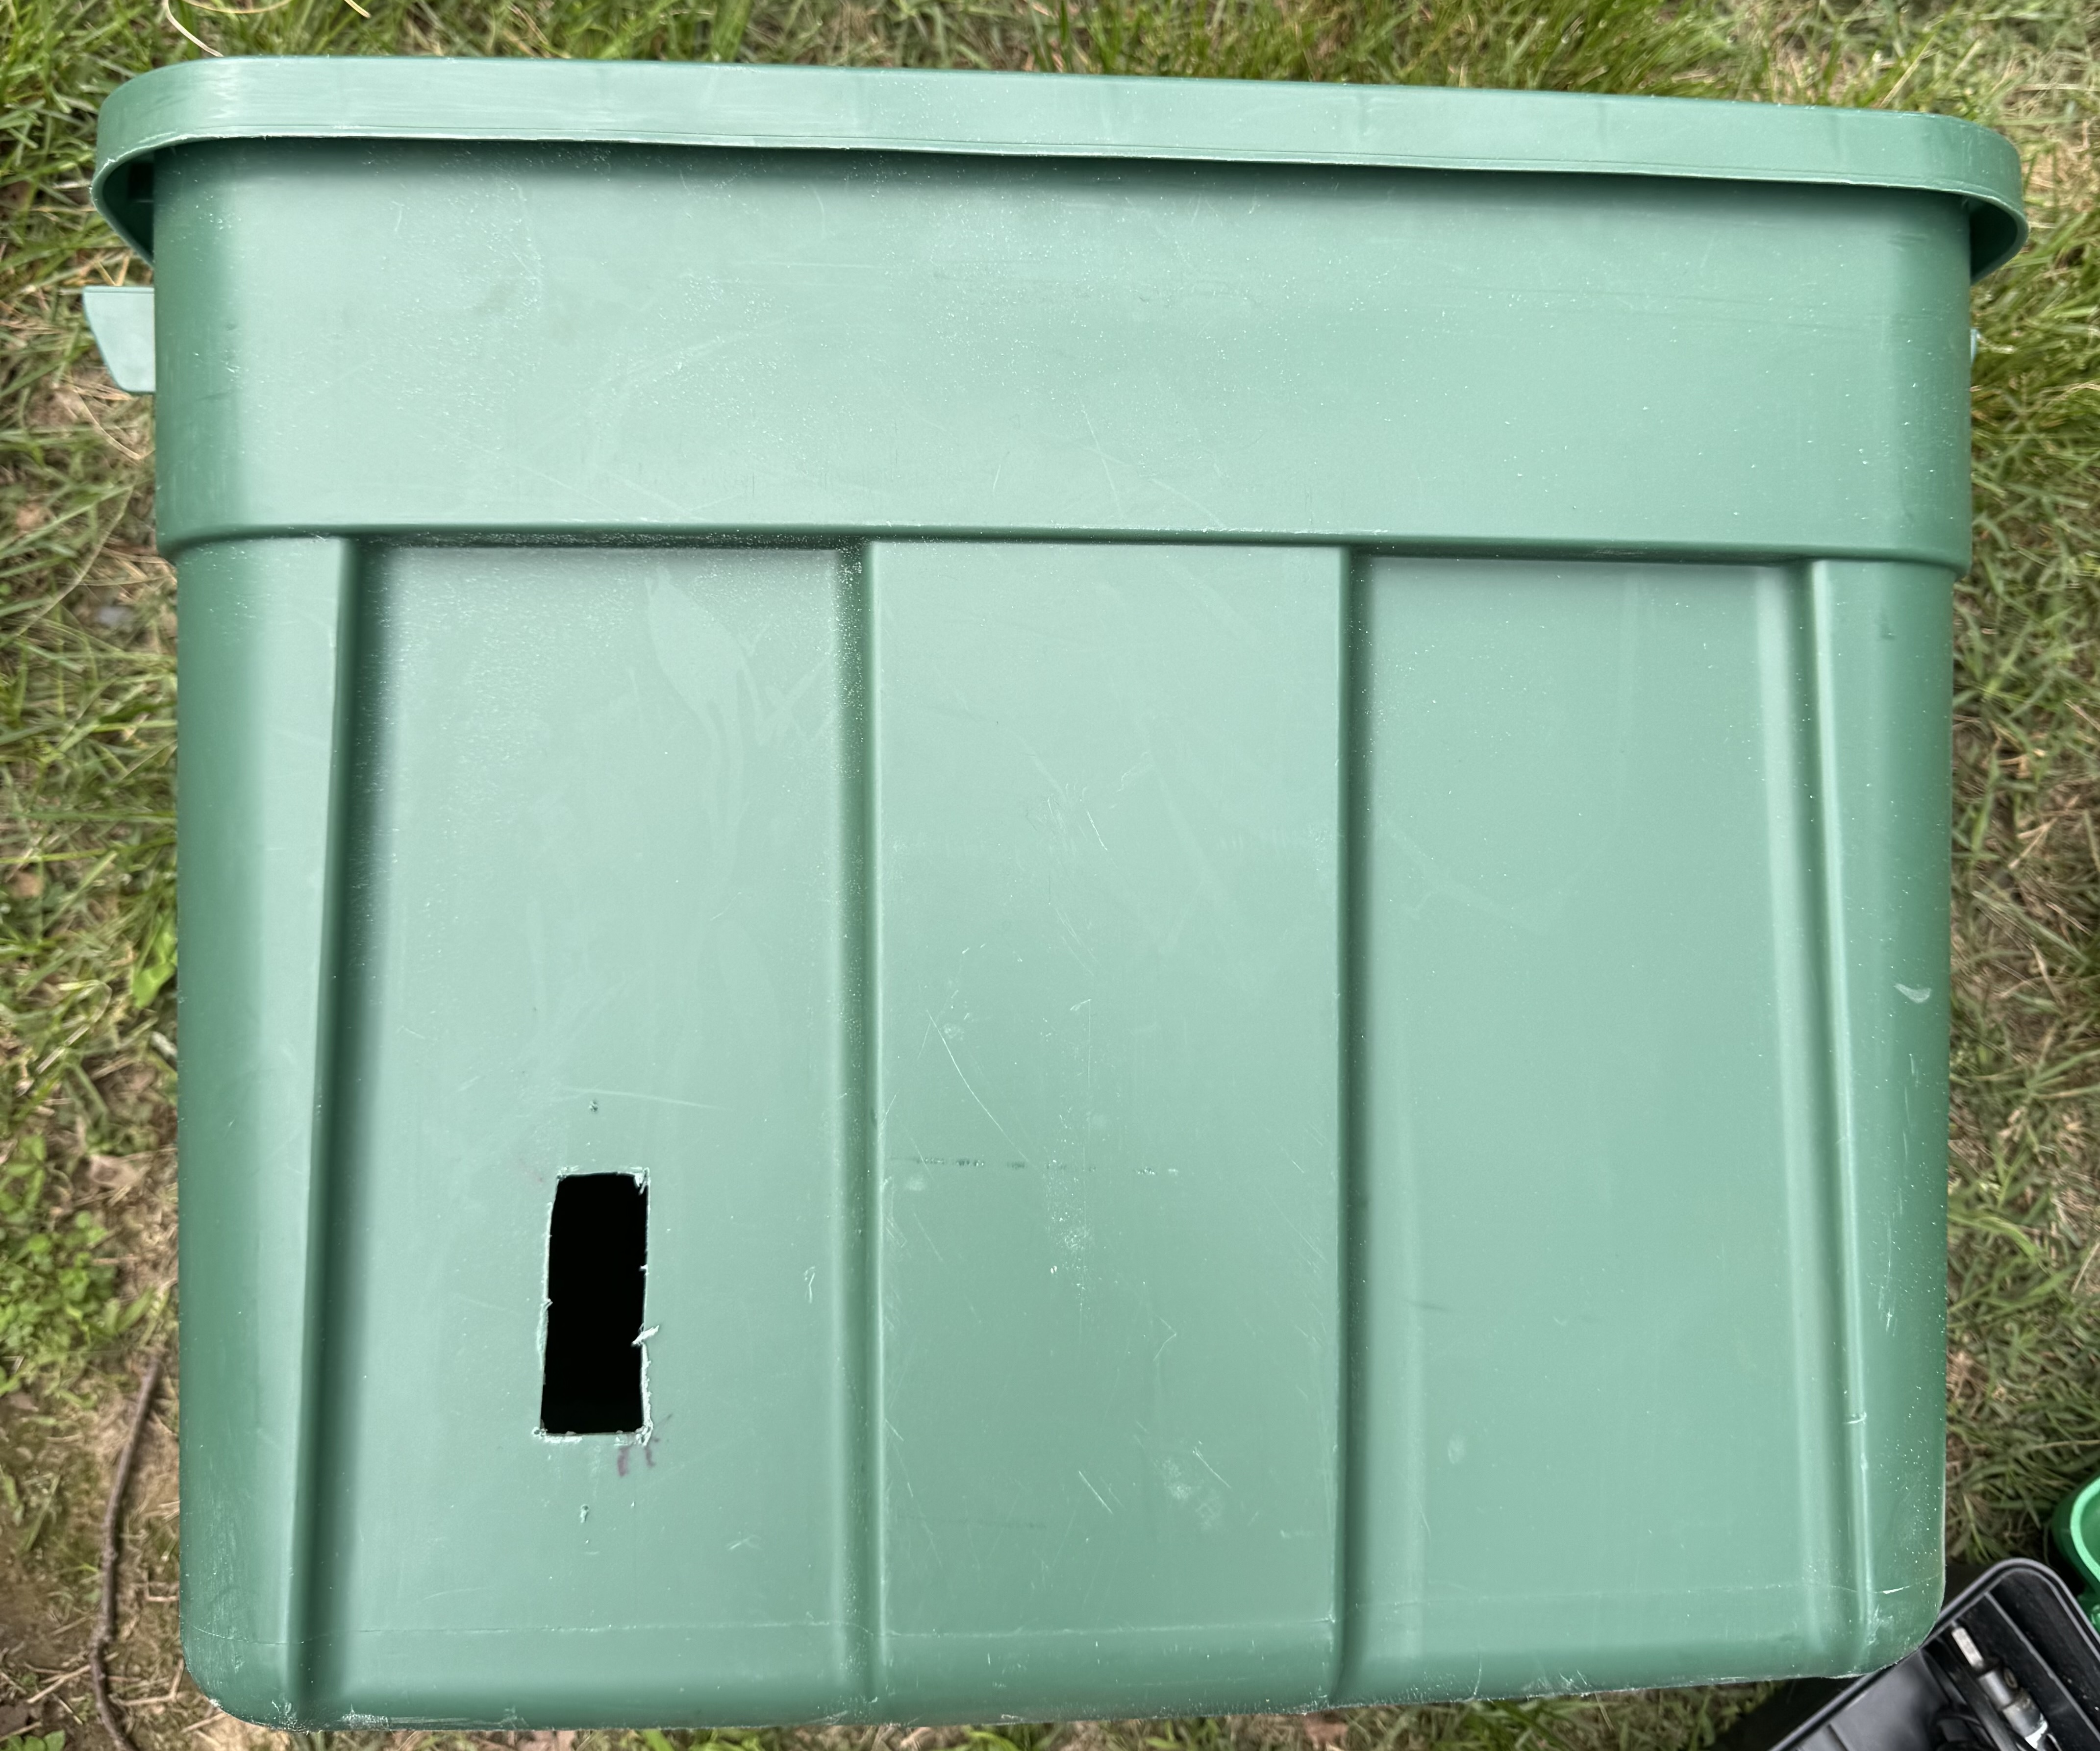
The tub itself is a hand-me-down Rubbermaid from, of all people, my dad, actually. I used a Dremel to cut two holes, one per outlet batch. Here it is after the first one was cut:
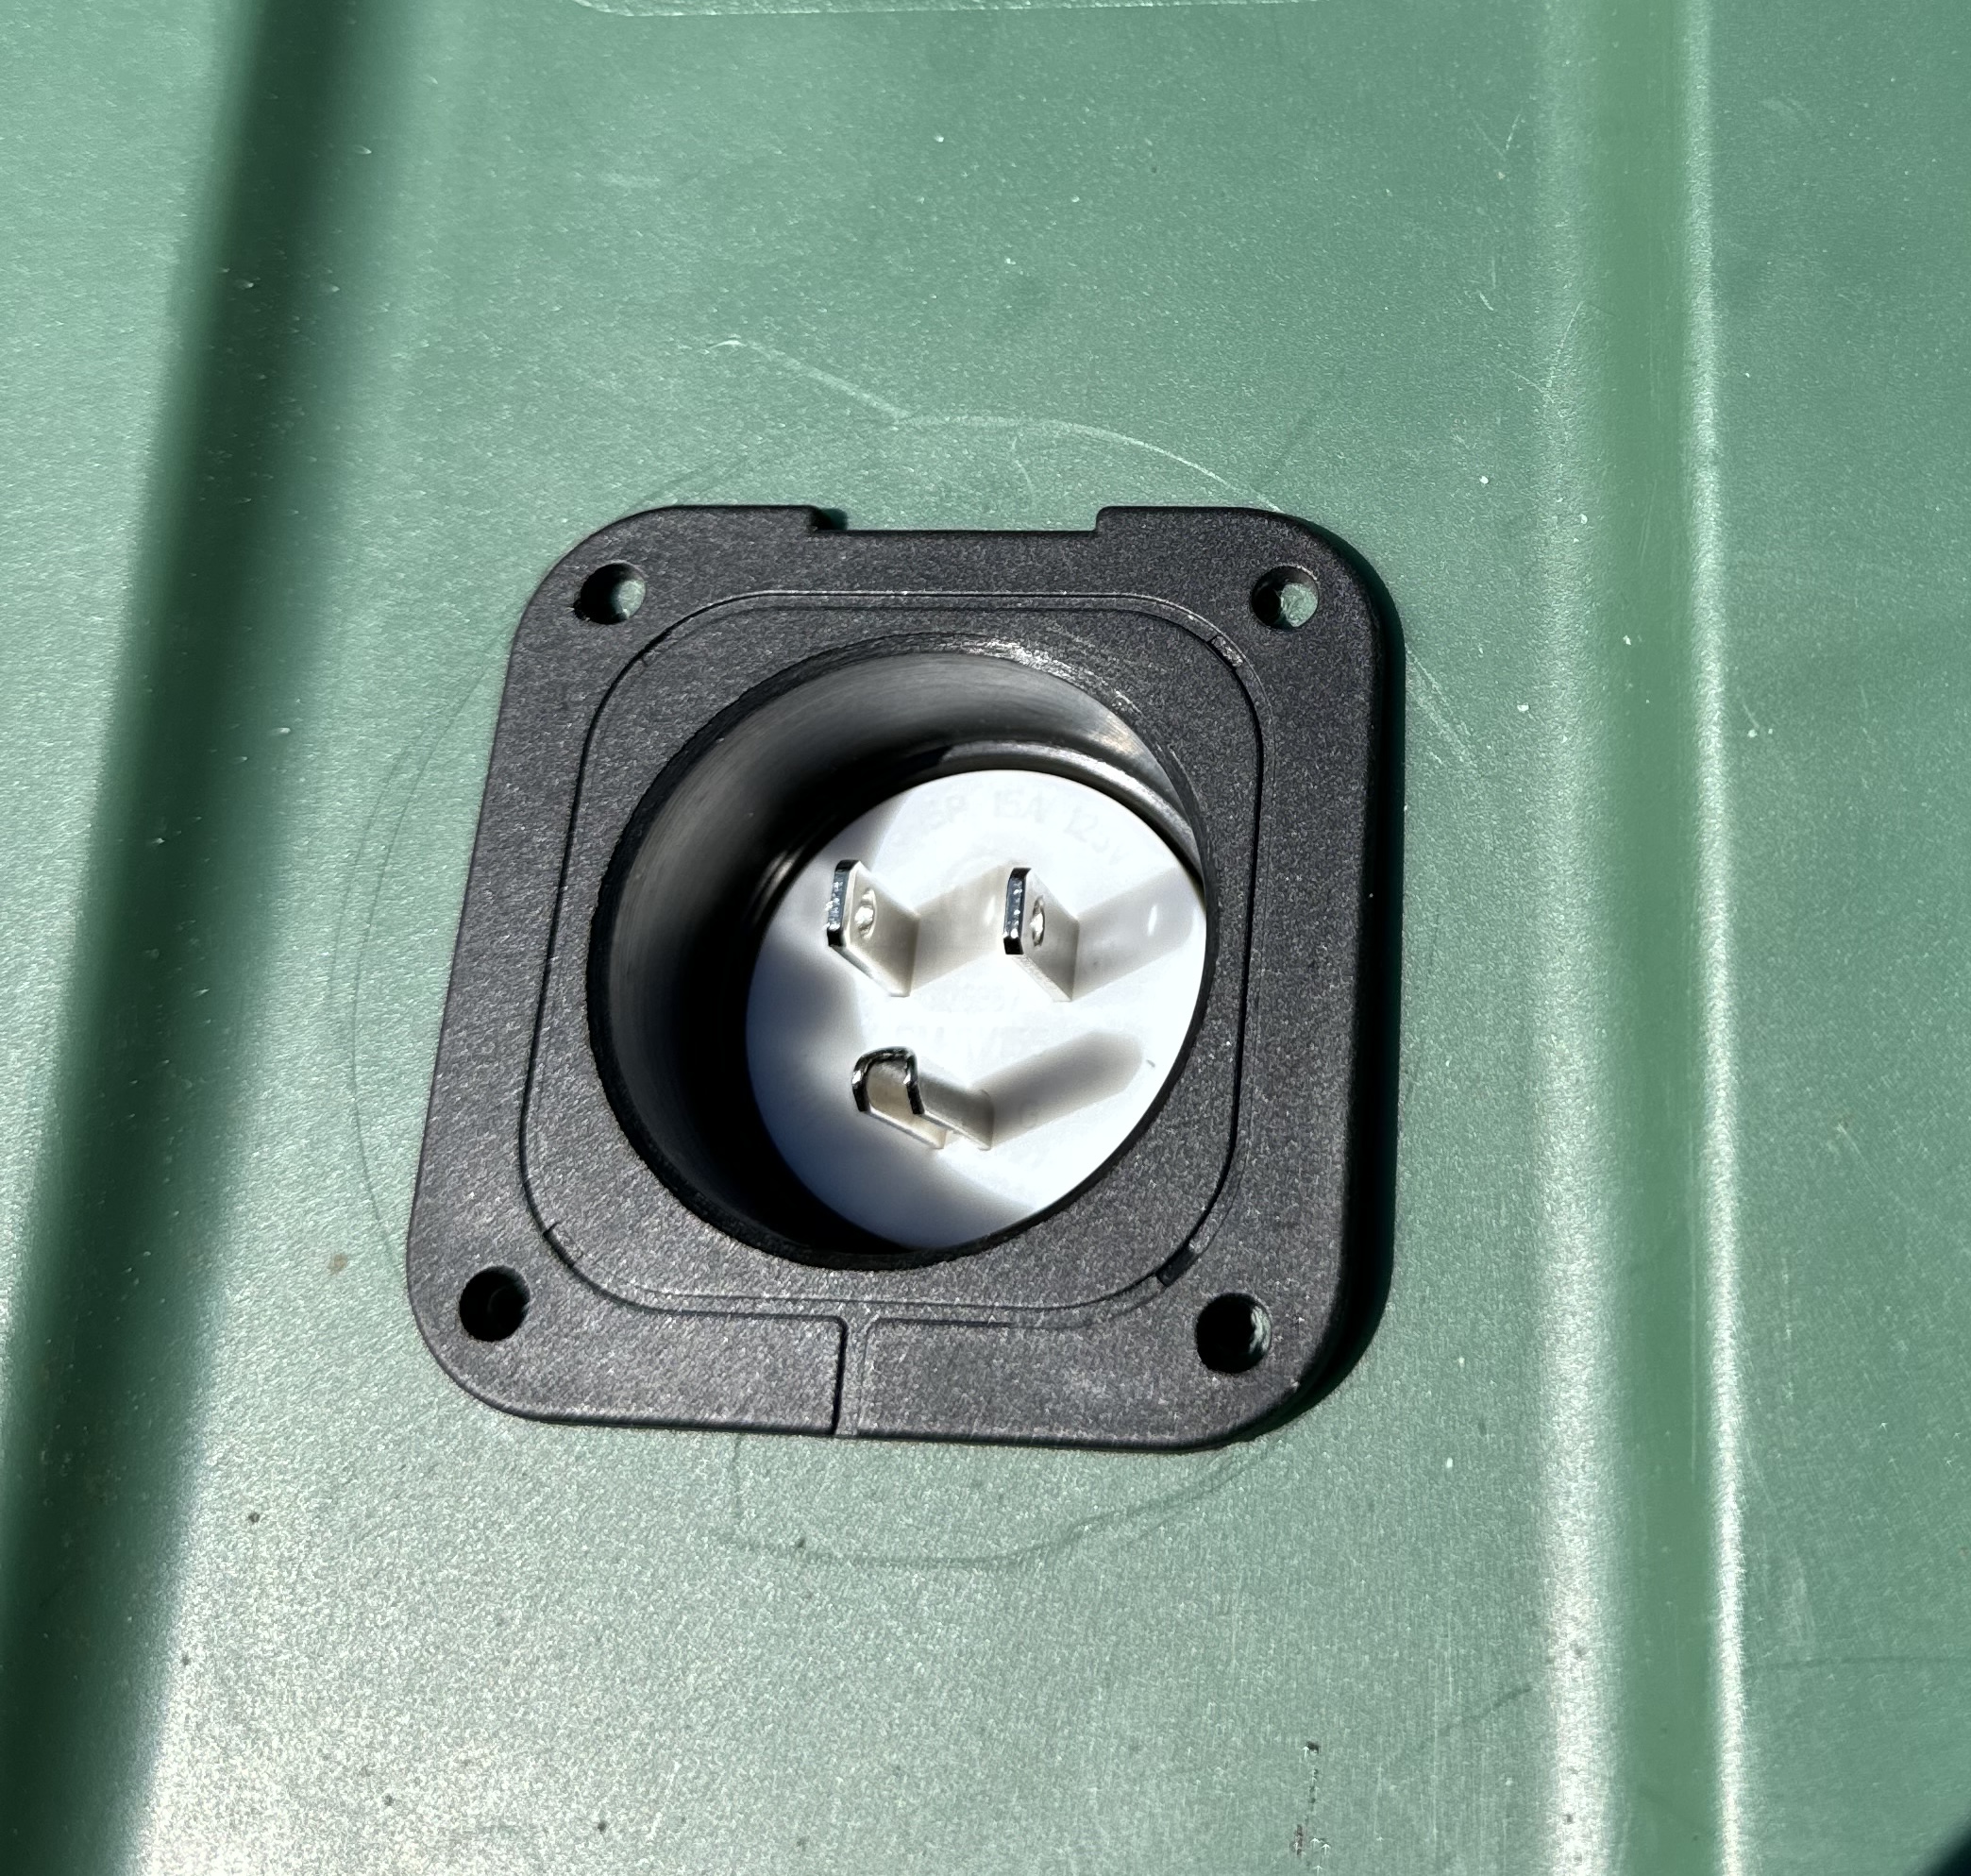
I also used a hole saw to cut a hole for a connection to “shore” power; this will be connected to the generator using a standard extension cord:
Several coats of spray paint later, and we now have a completed Tailgate Tub.
But could we still do better?
We could still do better.
Brian’s generator is very fancy — it’s a Honda inverter generator, producing a pure AC sine wave to keep our electronics safe. It’s quiet, fuel-efficient, light for what it is, and darned near maintenance-free.
It is also not silent, and does weigh ~50 pounds. It’s also smelly — no matter how fuel-efficient it is, it still burns gasoline and makes exhaust fumes. That means we need to cart a couple of long extension cords with us, so we can park the generator far away from our tailgate. These cords can be tripping hazards… especially, uh, towards the end of a tailgate. 🥴
As I was thinking about making our tailgates better and more efficient, I remembered the power problems Jason had a few years back. And I remembered that he solved his issues by getting a big-ass battery that had AC outlets on it.
With that in mind, since late last year, I’ve had my eye on a replacement for the generator, in the spirit of what Jason bought.
I had done some testing on the last tailgate of the year, to see how much juice I would need:
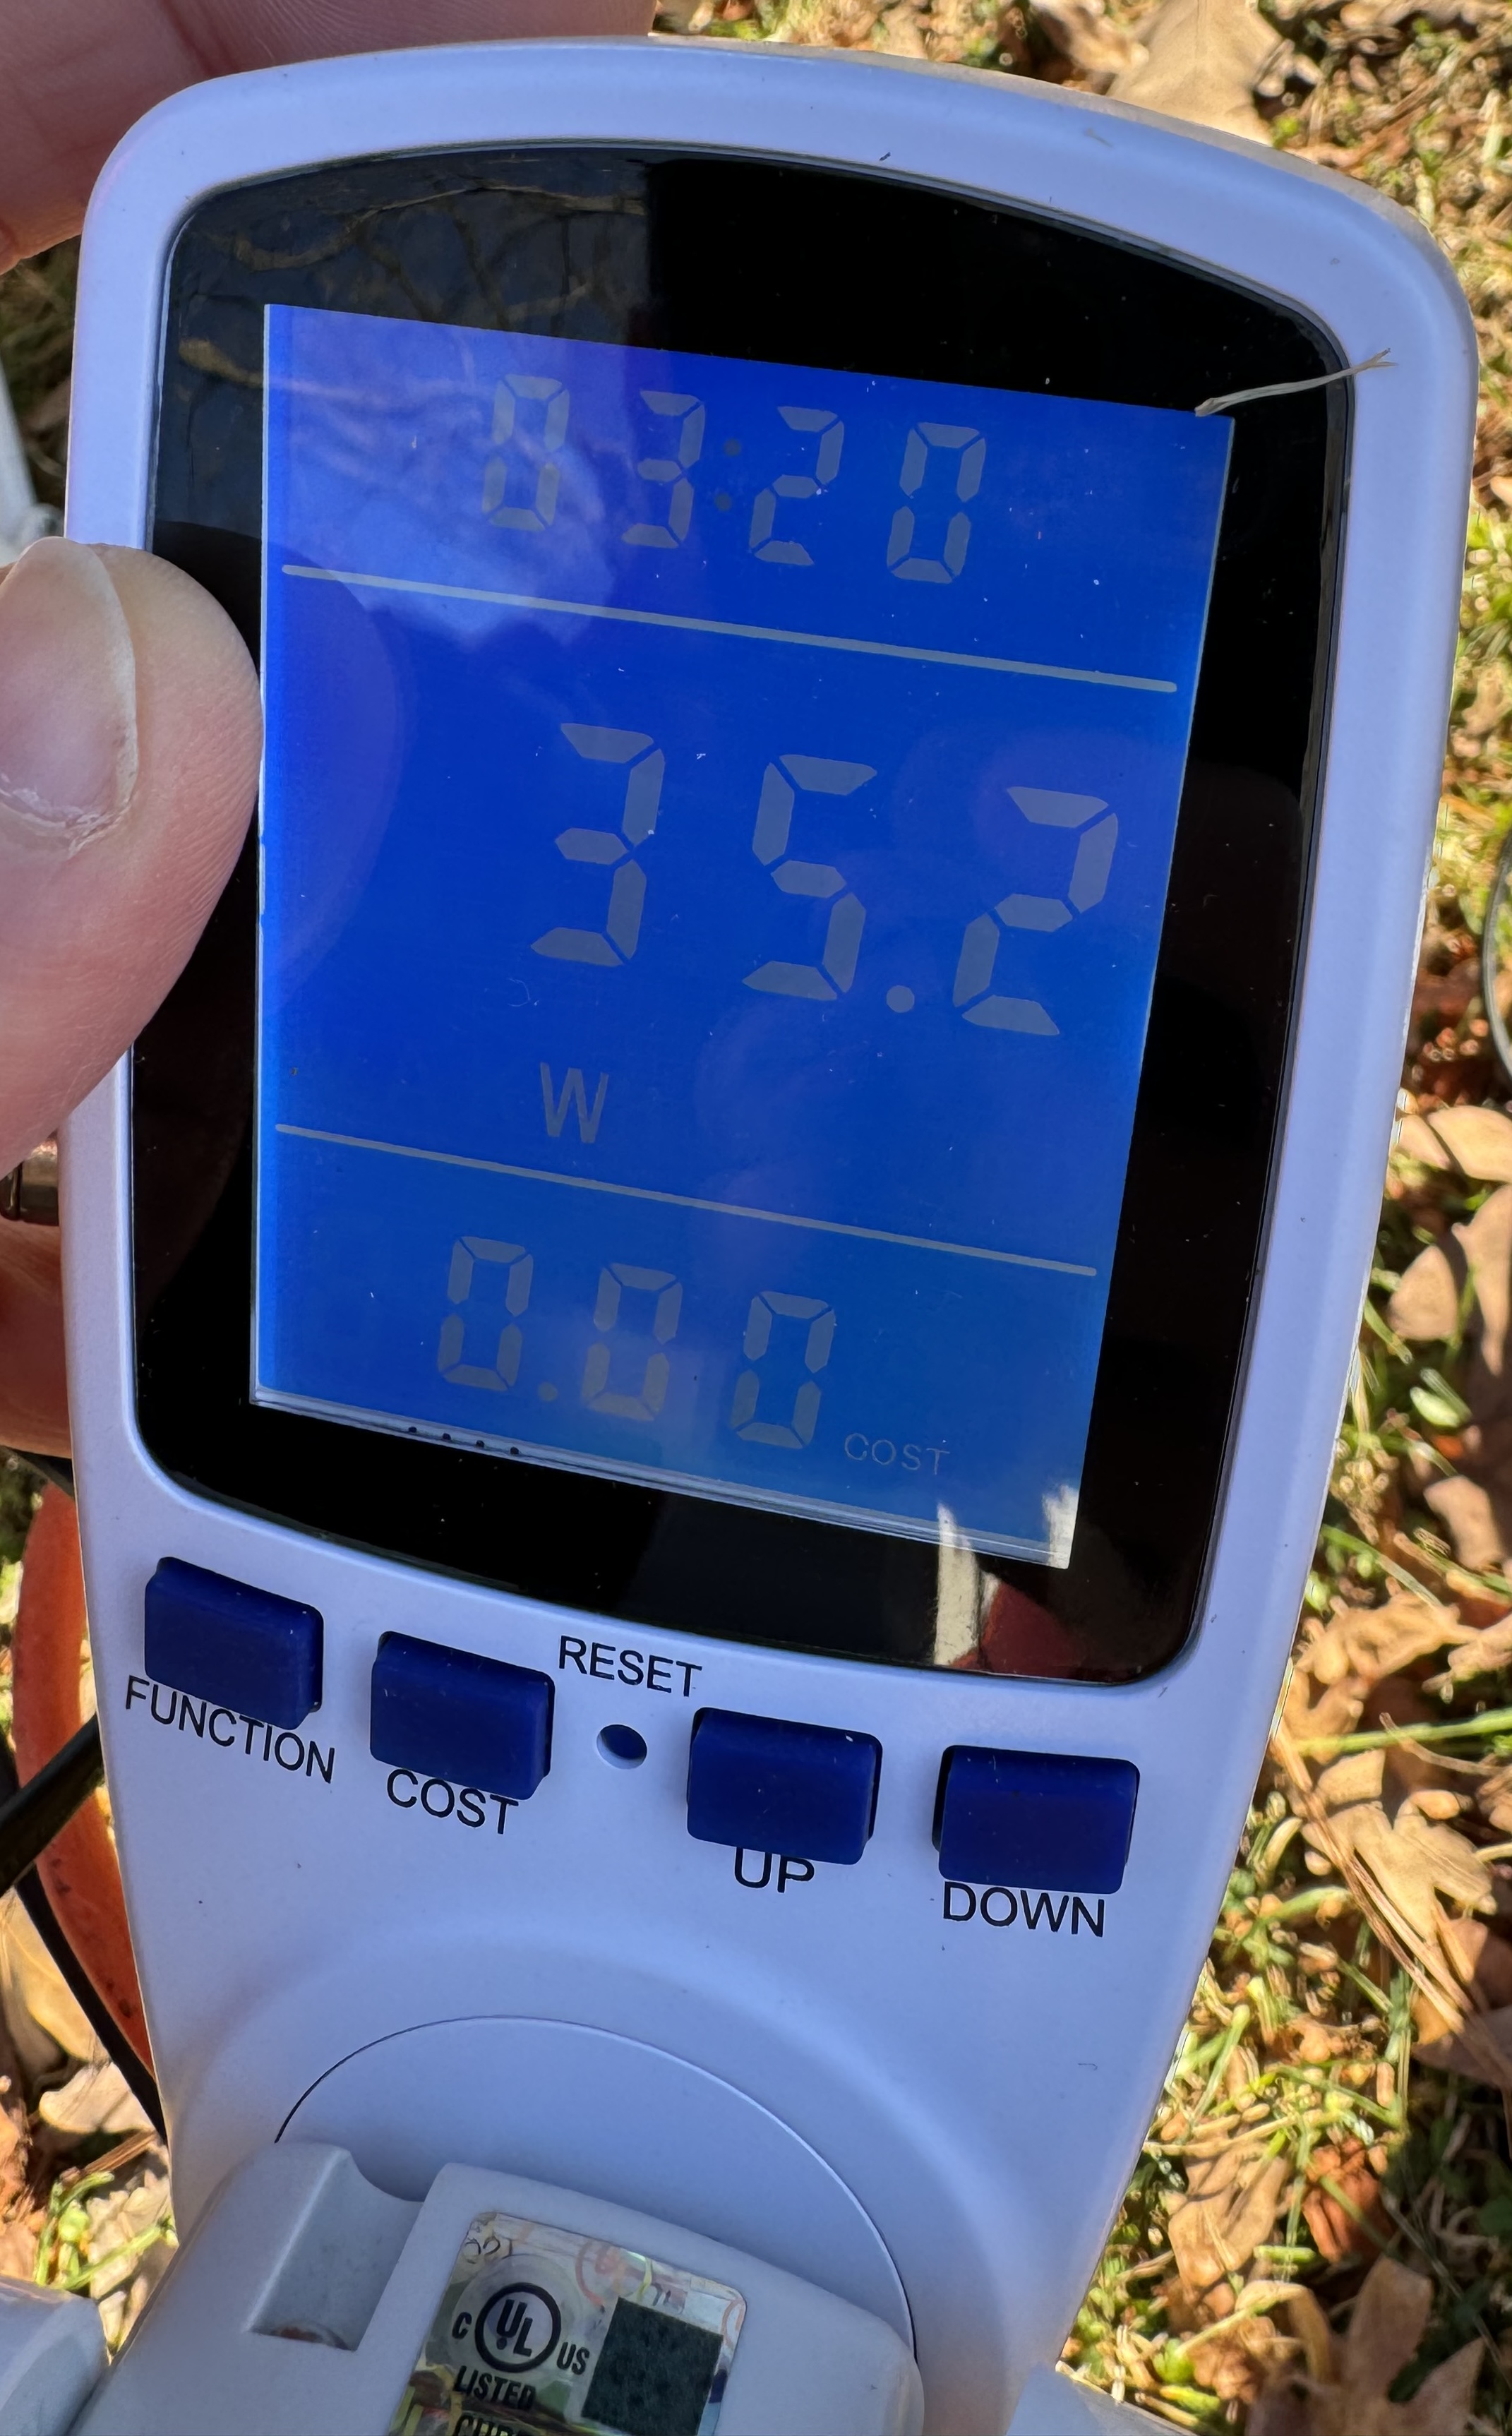
My thought is that I would need enough power to run a ~40 watt tailgate for about ~4ish hours, so roughly 160 Watt-hours at a minimum.
Thanks to an uncharacteristic supply of patience, and CamelCamelCamel, I was able to snag a Bluetti AC70 on a killer deal: $430 at the time of writing. This model has a 768 Watt-hour battery, which should be quite a bit more than I need for our typical tailgate.
Having the portable power station has several advantages:
- Runs very quiet — it has fans but no engine
- Since it runs nearly silent, we can station it under the serving tables
This eliminates the need for a couple of 50-foot (15m) extension cables - It’s far more environmentally-friendly
- It doesn’t require gasoline
- At 20-ish pounds, it weighs roughly 30 pounds less than the generator
So, all told, here’s a backyard demonstration of the setup:
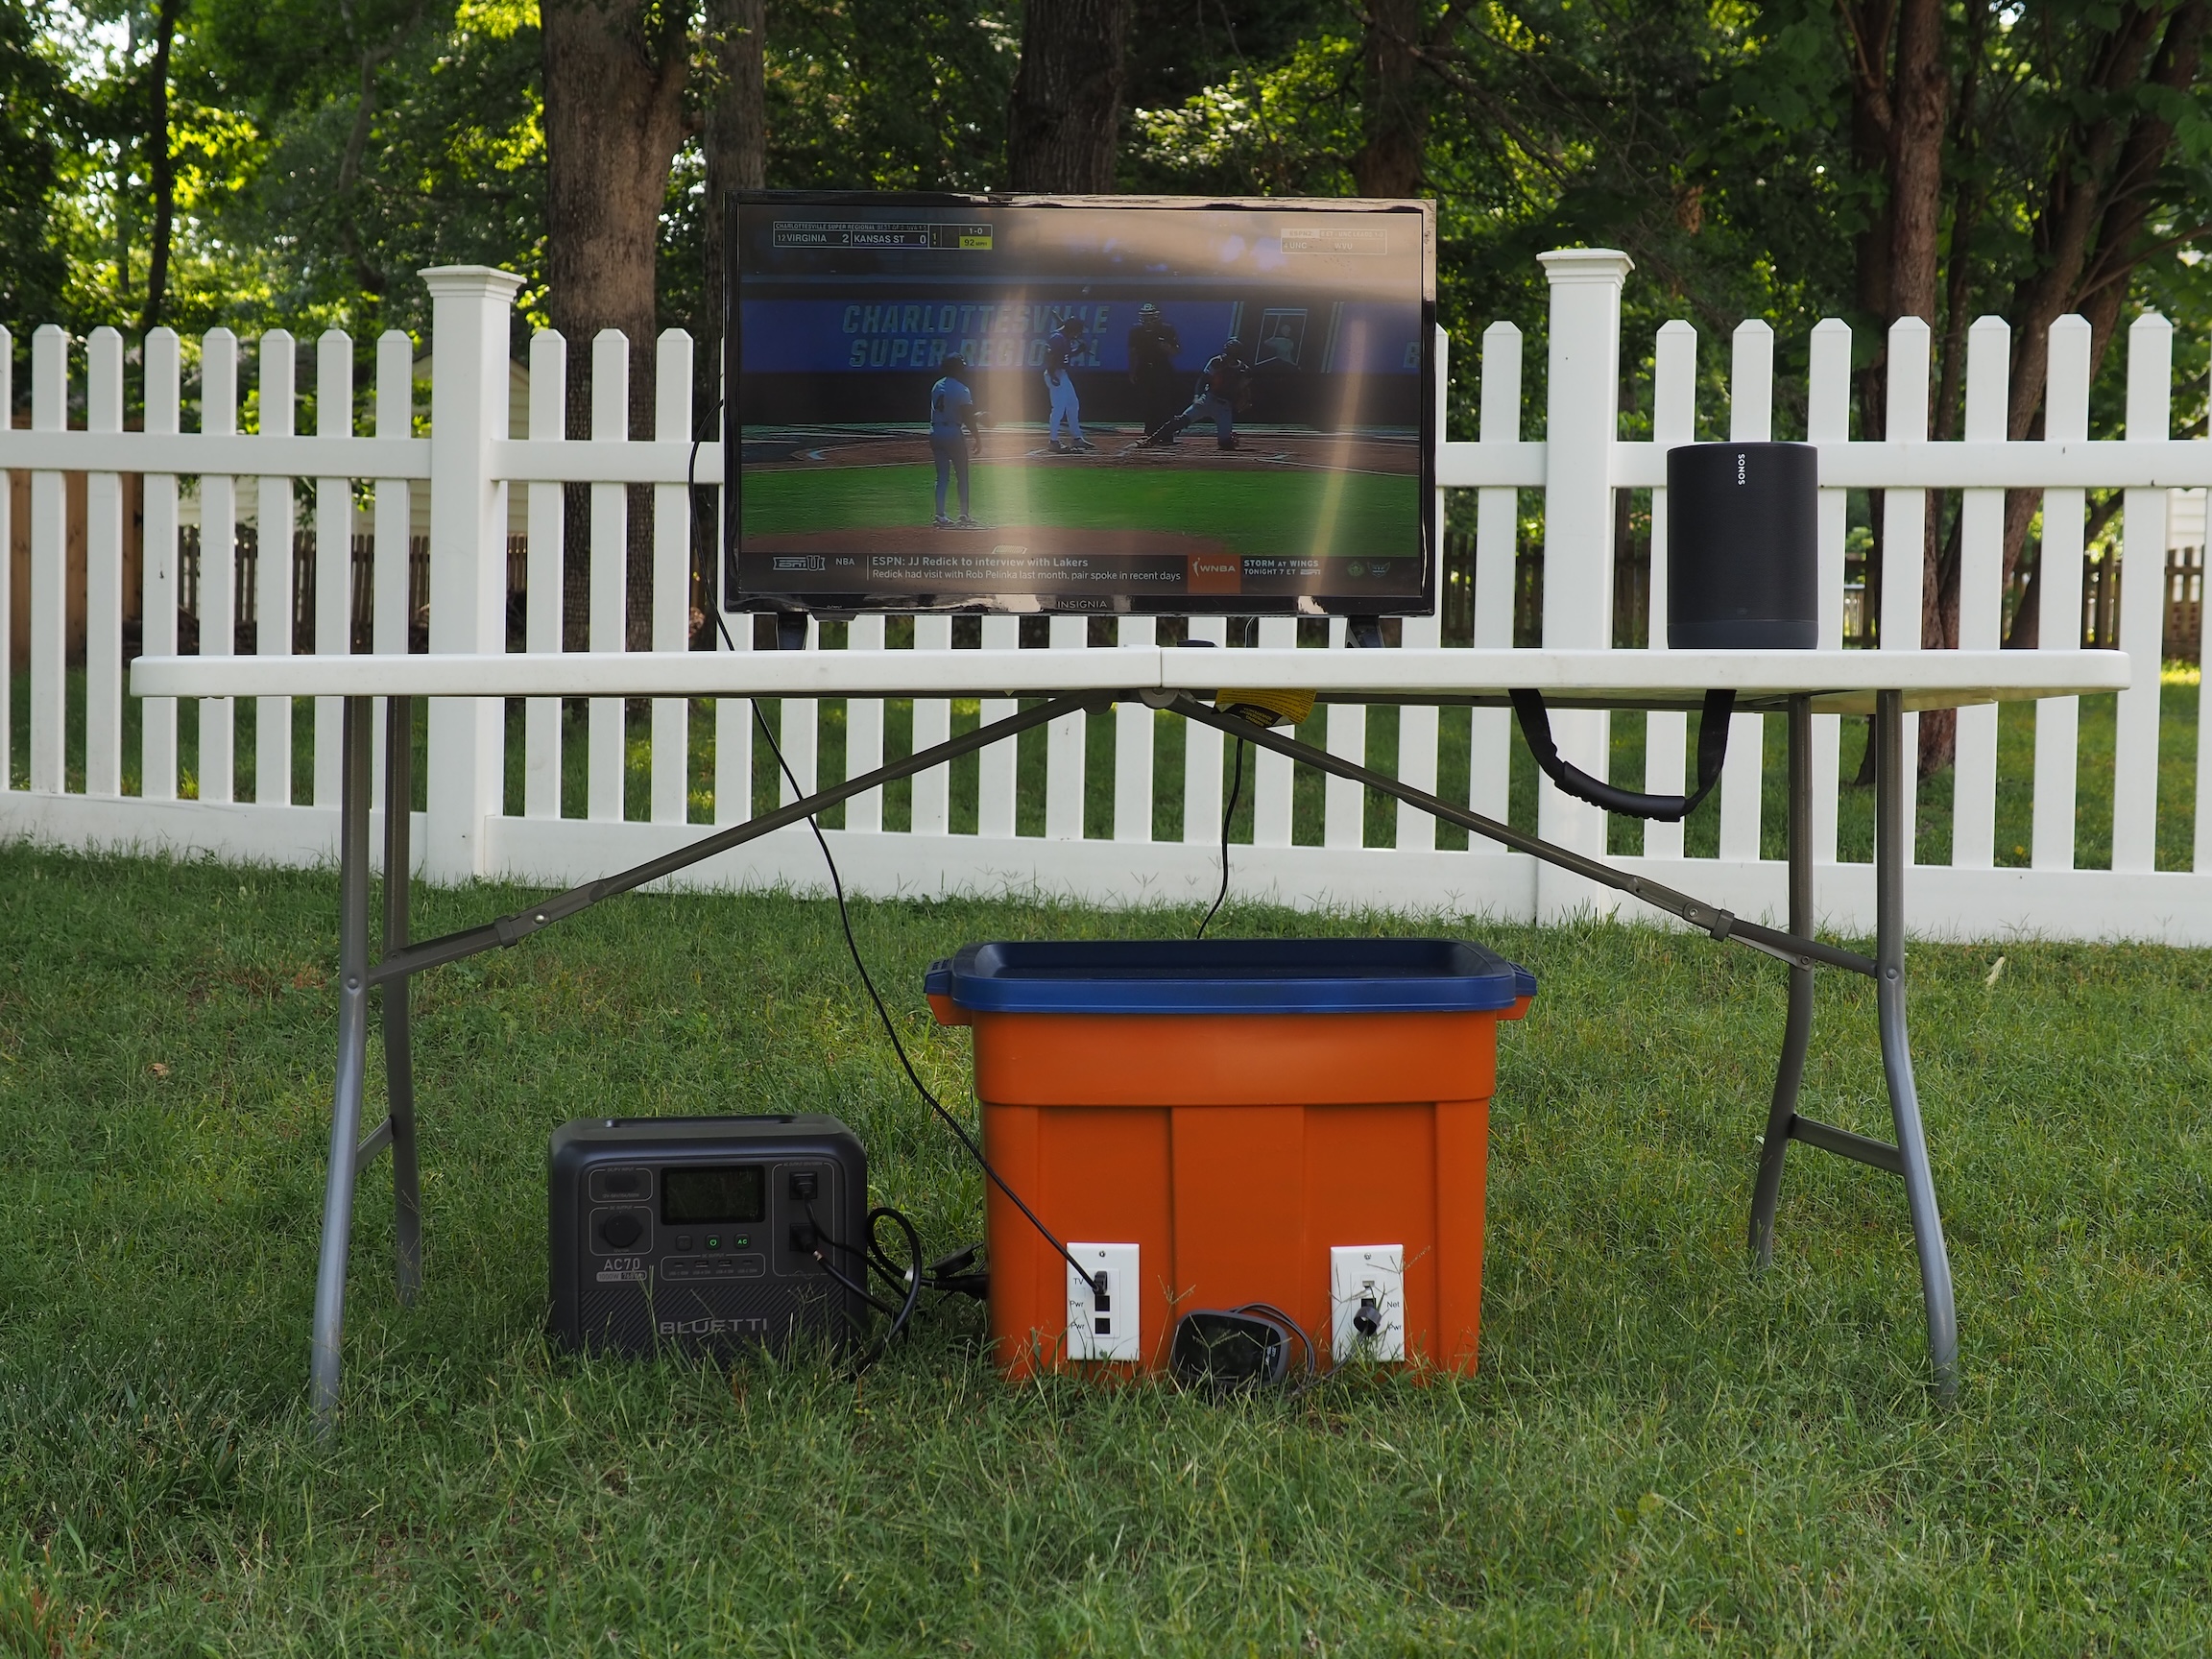
And here’s a close-up of the Bluetti and the tub, sitting in our [tall] grass:

And the inside, before Stephen guilts me into improving my wire management:
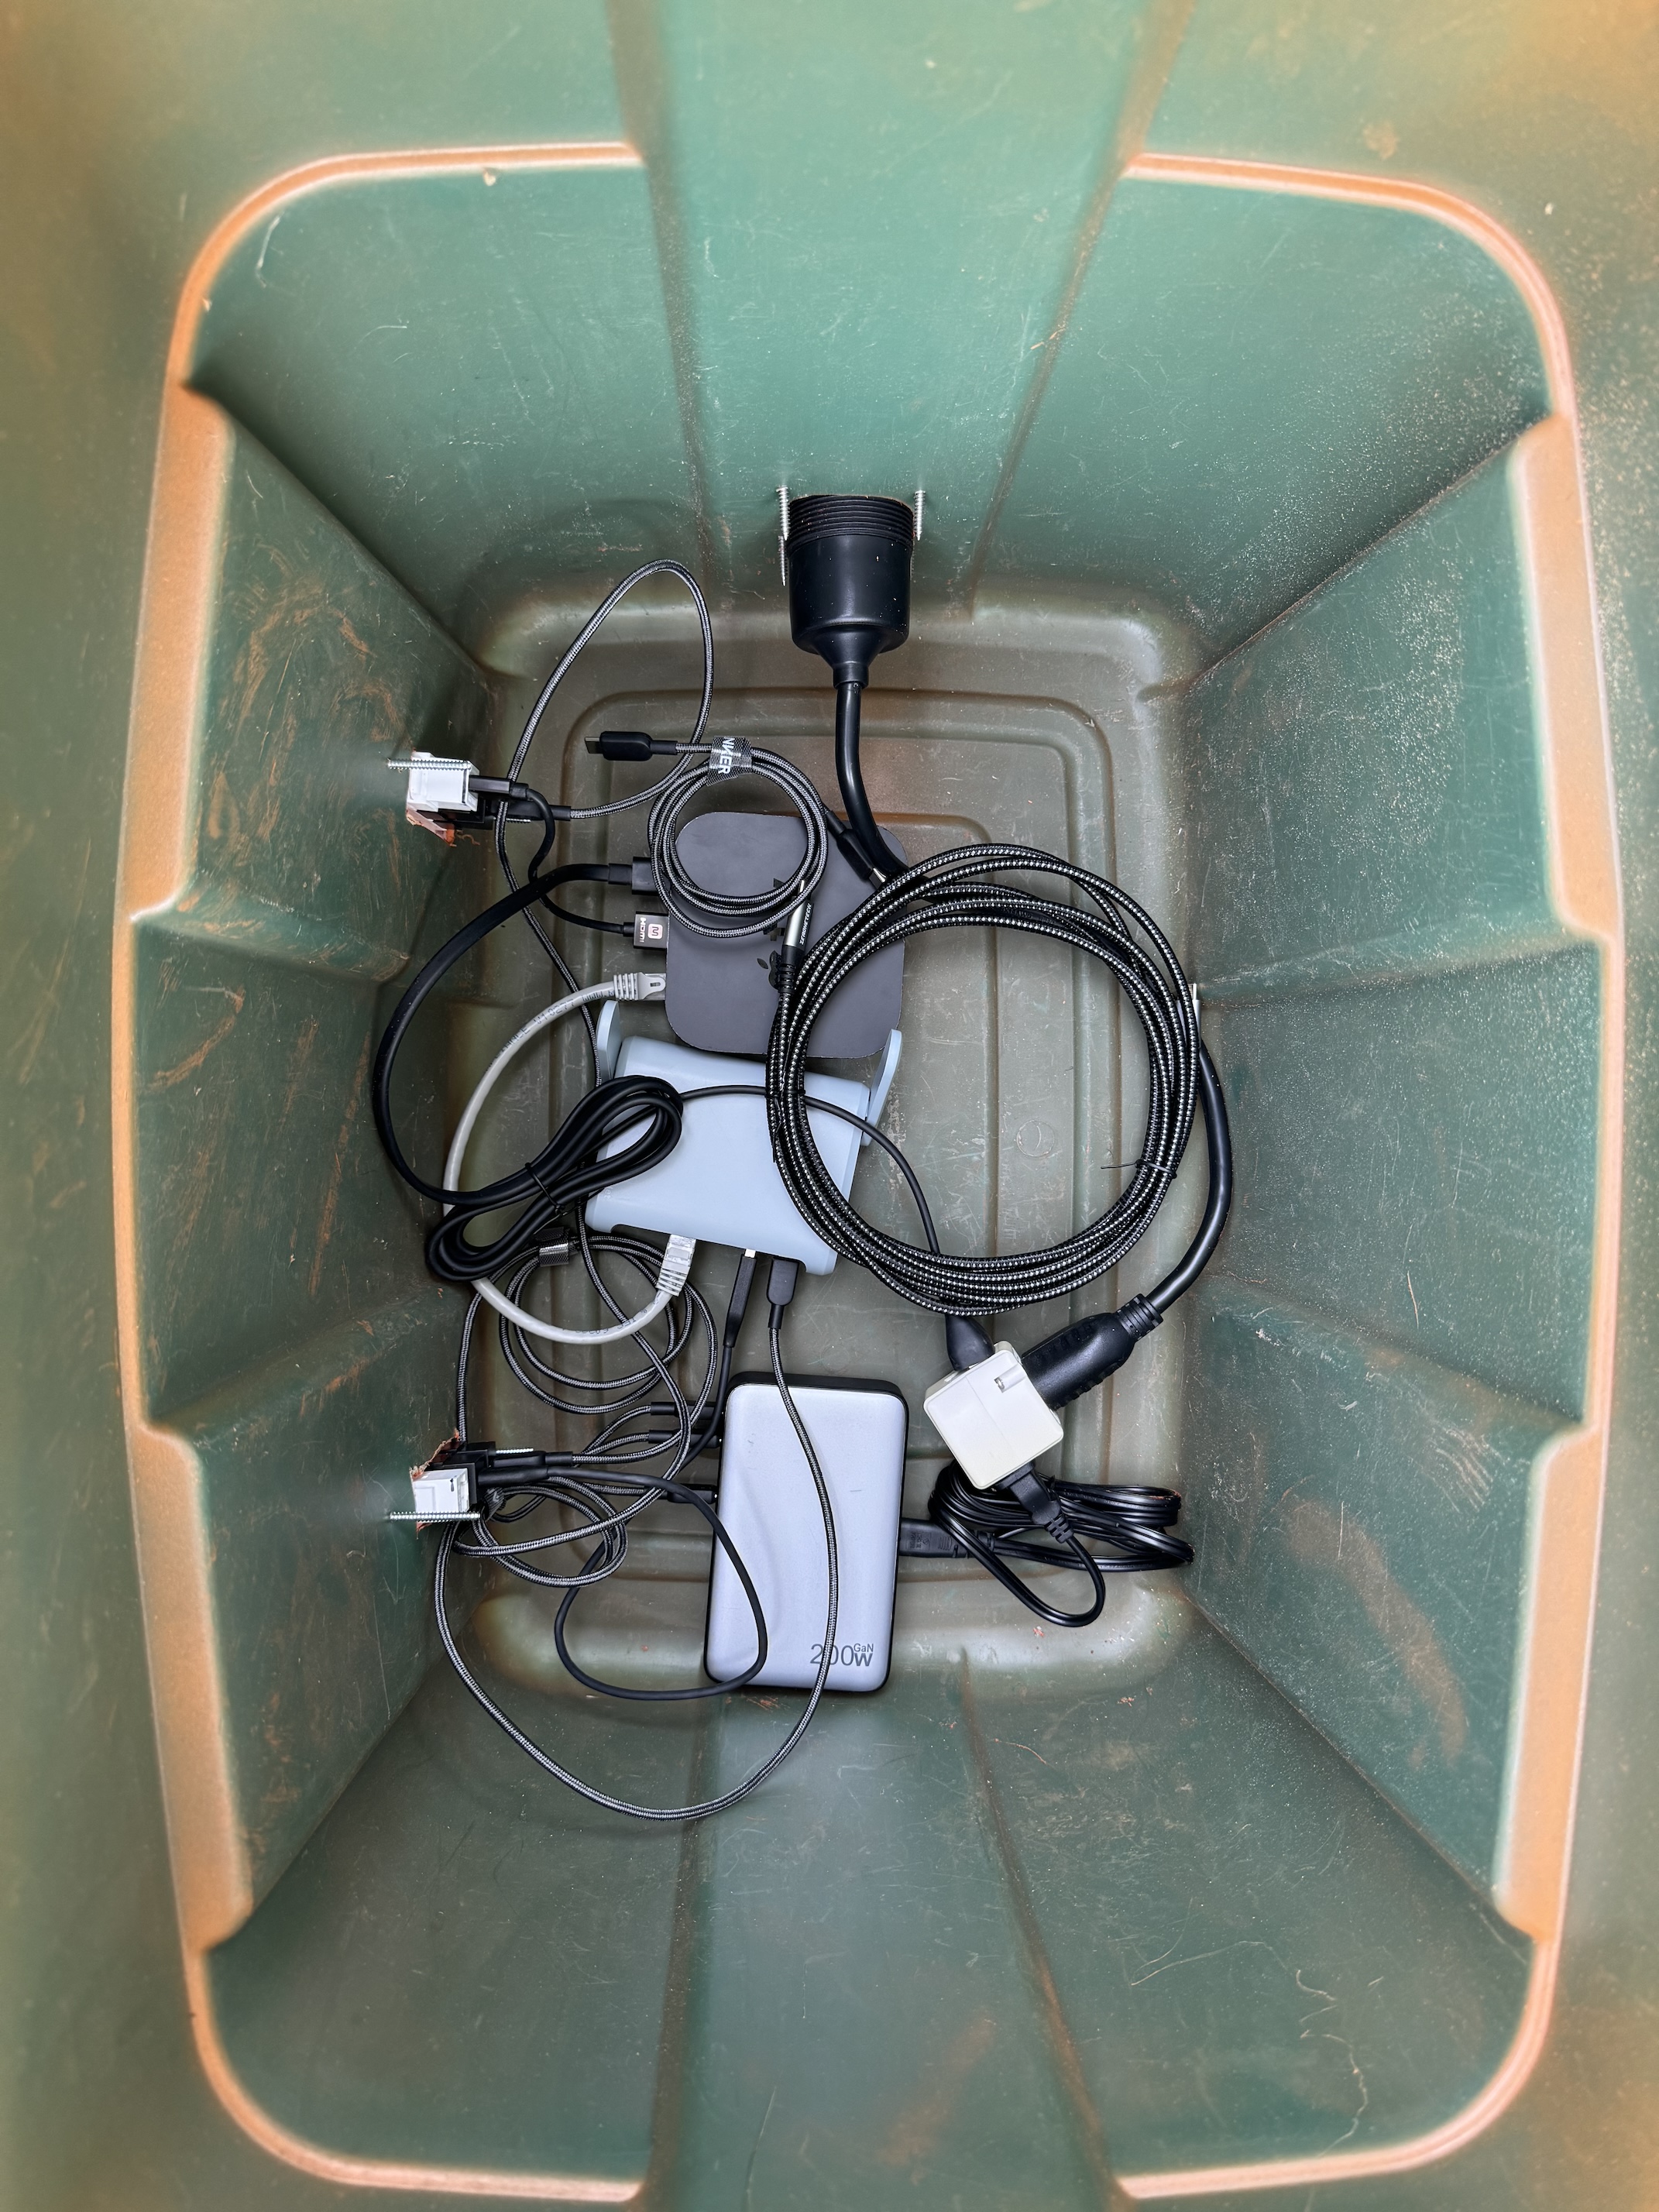
The tub is too big for just the electronics within it, but we’ll put other tailgate supplies in the tub as well. I’ll have to fashion some sort of shelf to put down above the electronics, but that’s Future Casey’s problem.
I’m pretty damn pleased, if I do say so myself.
Though I can absolutely use my phone or iPad to serve internet, it turns out that our local library will actually let you check out a T-Mobile hotspot just like you could a book. And a neighboring library — which has reciprocity with our own — will loan Verizon hotspots. So my hope is that for a lot of this season, we can borrow some hotspots and slurp up that internet instead of my limited tethering allotment. ↩
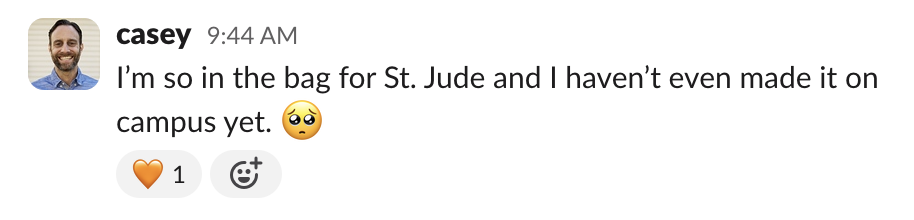
Last week, I was lucky enough to be invited to visit Memphis, Tennessee, to participate in the invite-only St. Jude Play Live+ Summit. Just about 400 game streamers, fashion and fitness influencers, and a handful of podcasters all came to learn more about St. Jude Children’s Research Hospital.
The two-day event was something else. I sent this message in the Relay Slack about halfway through the opening session:
During my time there, I heard many stories that went something like this:
[I/my child/my sibling] was diagnosed with a rare form of cancer. Our local doctors had no idea what to do, and told us [patient] had about a 10% chance of surviving.
We called St. Jude, and hours later, we had plane tickets to Memphis in-hand. Days later, [patient] was getting treated.
Many times, the same story. St. Jude would turn a hopeless situation — often times quite literally a death sentence — to a story of perseverance, effort, and survival.
How can you not love such an amazing organization?

The campus is, of course, amazing. It’s also a bit odd — it’s a place that, at a glance, serves two different masters. On the one hand, their number one priority is the treatment of the patients that come through their doors. But simultaneously, they are doing everything in their power to complete their mission: ensuring no child should die in the dawn of life. That means intense, multidisciplinary, collaborative research. Research that is then given away, so that hospitals around the world have the opportunity to use treatments invented at St. Jude. All this while also doing everything they can to accommodate patient families, including siblings, who are swept along for this terrible, awful ride.
Naturally, St. Jude endeavors to think of everything — including such basic needs as having a salon and school on-site.
To quote my dear friend (and patient dad) Stephen:
The sheer scale of St. Jude is hard to convey unless you’re walking around some of the buildings, learning about the interplay of research and patient care that is unique to St. Jude.
And all of this is accomplished without patient families paying a cent.
It’s a breathtaking place. The magnitude of their mission, the size of the operation, and the staff that believes, through-and-through, that they have a calling to do this. To do whatever they can to help sick kids.
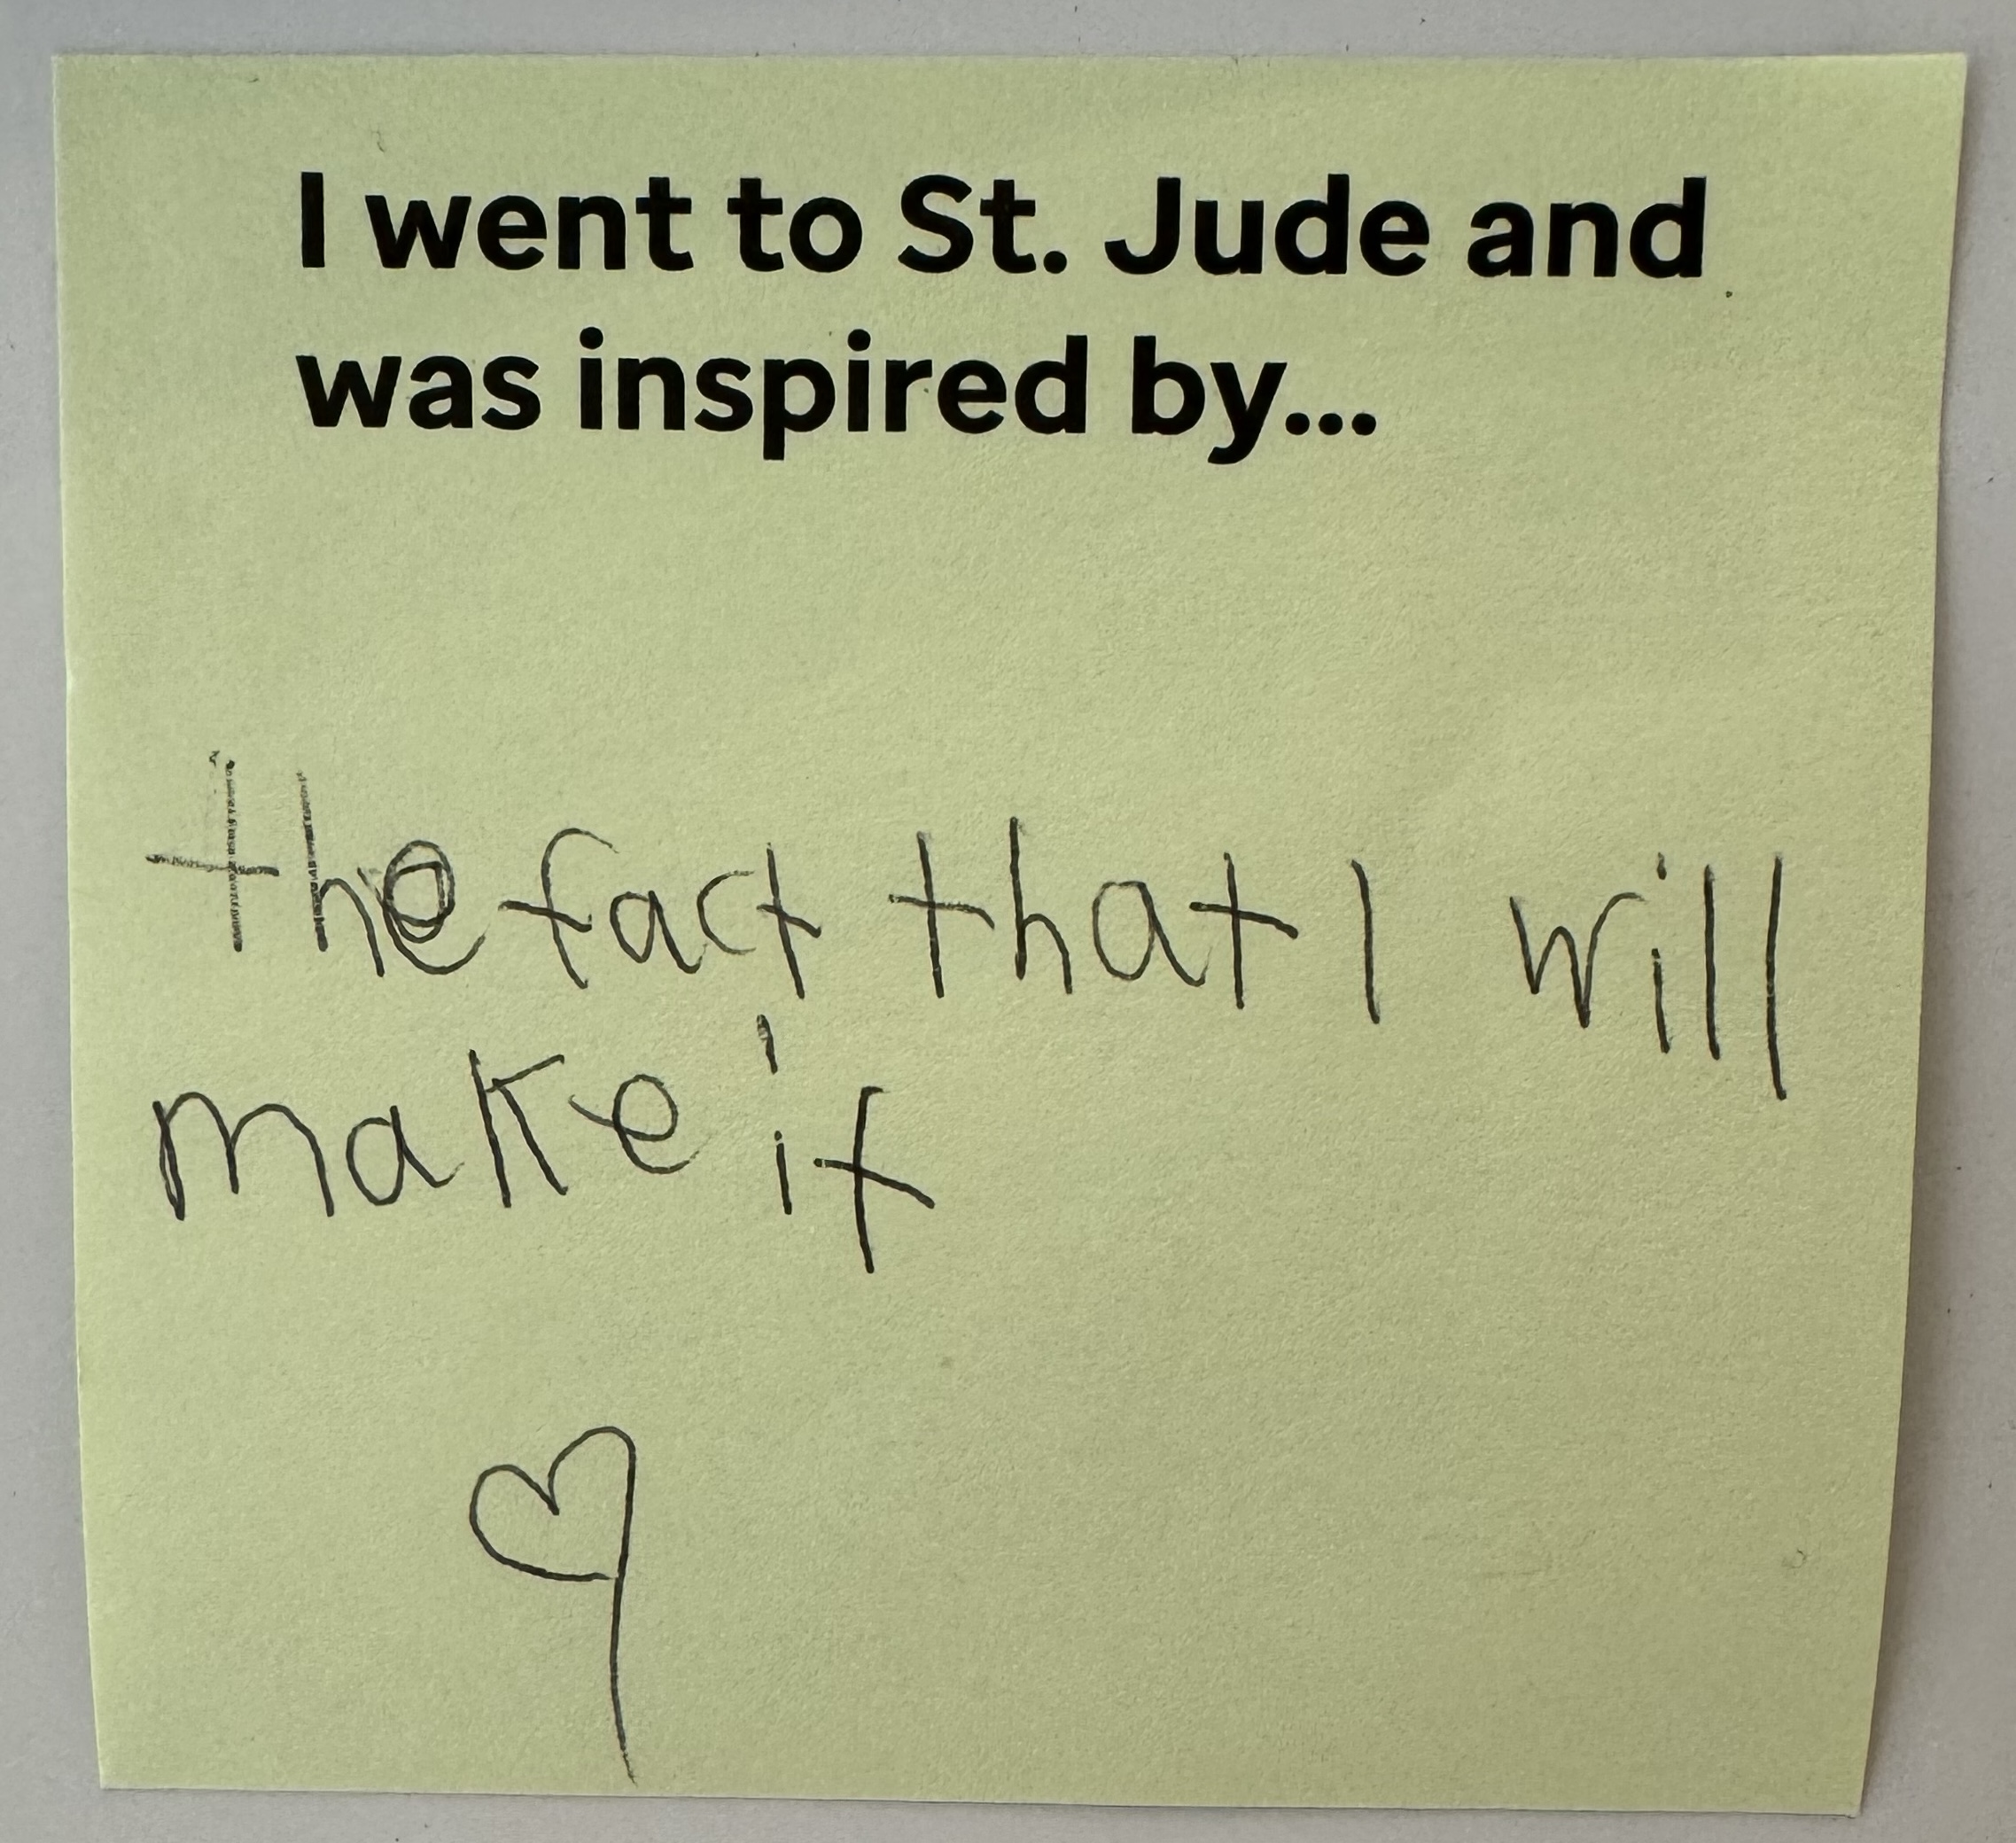
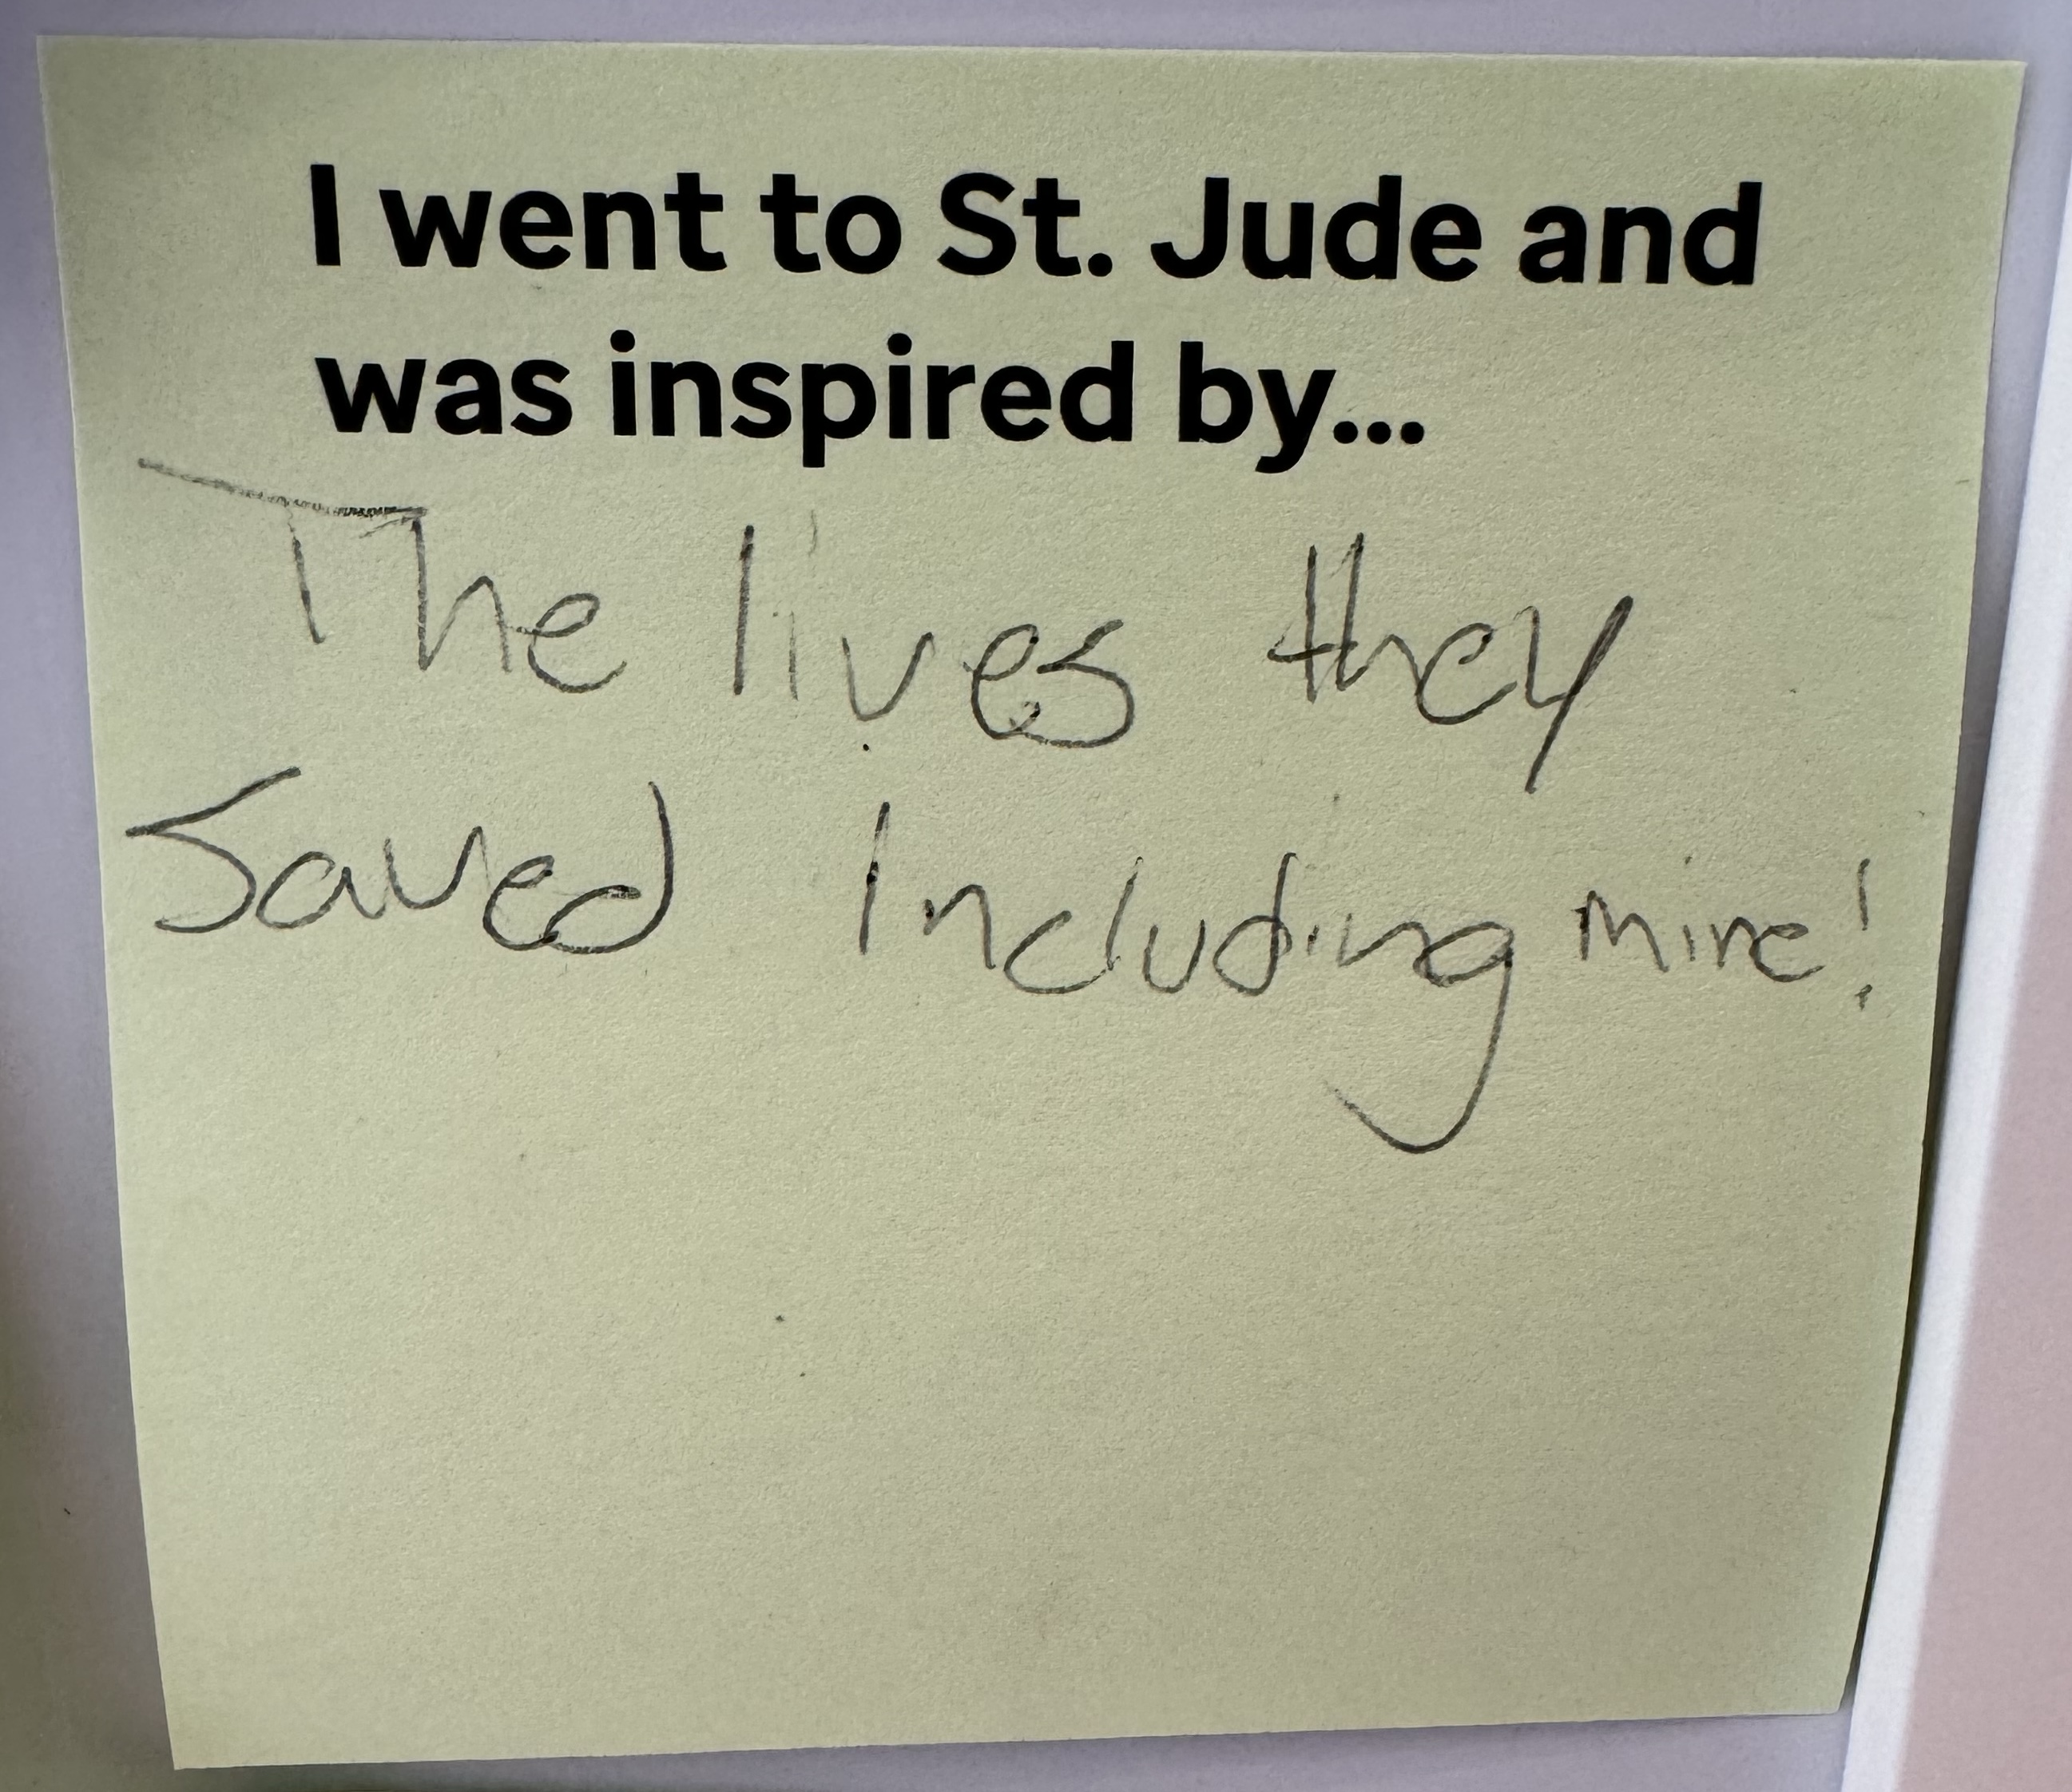
As a part of the tour we took on campus, we spent some time in the Pavilion, which has several exhibits about its history, and that of its founder, Danny Thomas. In there, they had two boards, where you could answer the question “I went to St. Jude and was inspired by…”.

I can’t help but share two post-its I saw while there:
September is Childhood Cancer Awareness Month. If all goes according to plan, I will be joining several of my friends to participate in the 12-hour Relay FM Podcastathon for St. Jude. I’ll be posting about it again when the time comes, but I hope you join us in raising money for this incredibly meaningful cause.
In my journey to become a Tailscale super-fan, I watched several videos done by a talented Tailscalar who has a great knack for instructive videos. Shortly after my Tailscale post, Alex Kretzschmar reached out and asked me if I’d be willing to guest on his podcast, Self Hosted.
Imagine my shock — and how flattered I was — because Alex is that talented Tailscalar whose videos I had been watching! 😊
Self Hosted is Alex and Chris Fisher discussing exactly what you’d expect: hosting services yourself, and how to make the most of it. On my episode, we discussed my journey into self-hosting, what I’m hosting, and how I do it. We also can’t help but discuss Alex’s newest purchase: an Apple Vision Pro.
I knew this was going to be fun when I came to find out that Alex, Chris, and myself all drive Volkswagen Golf Rs or GTIs. But that was just the first piece of commonality between us. 😆
While Jason was off chasing waterfalls Talons eclipses, I
joined Myke on this week’s episode of Upgrade.
Talking tech news with Myke is something we typically do sparingly when we record Analog(ue), so it’s always a pleasure to swing in and have a chat exclusively about nerdy stuff. On this week’s episode, we discussed our Apple Watch band collections, what’s new in Vision Pro videos & apps, new developments in third-party and first-party app stores, as well as some iPad & robot rumors.
Myke also facilitated me trying Spatial Personas, and hoo boy did we both have some thoughts. We also made our return to the Casey Liss Vibe Check segment, which is always so fun, because I never know which direction it’s going.
Naturally, we rounded out the show with #askupgrade and in the bonus Upgrade+
we discussed my recent experience with Sonos.
Upgrade is not only on my list of can’t-miss podcasts, but it’s one of the very few shows that are on the listen-immediately list. It’s an honor to appear on it, and always so much fun.
As a bonus, you can also watch the show on YouTube, featuring our actual faces, if that’s your kind of thing. 😊
I am a Sonos super-fan. I had heard for years that their stuff really does what a lot of Apple stuff doesn’t do anymore — it just works. In late 2022 I bought a home theatre setup, as well as a Roam, which is Sonos’ Jambox-style portable speaker.
I cannot say enough good things about both products.
However, yesterday, the Roam died. It was sitting on its charger, and just… bricked itself. I couldn’t reboot it, I couldn’t factory reset it, I couldn’t charge it, nothing. It’s almost as though the battery decided to ride off into the sunset.
My understanding is that this issue isn’t common, but perhaps isn’t exactly uncommon either.
So, I called Sonos support this morning, and braced for a fight — I’m about six months out of the warranty coverage.
Thirty minutes later, without any sort of arguing nor complaining, I have a RMA, and I’ll get a new Roam in a couple of weeks.
I know this isn’t a new thought, but it struck me so strongly after getting off the phone with Sonos: when a product fails, the company that sold it has an incredible opportunity: they can sour the opinion of a super-fan, or they can absolutely cement it in place.
If I had to fight to get the Roam replaced, it would have made me think twice about buying more Sonos stuff. If they refused to replace it, I would likely stop buying Sonos products altogether. The Roam wasn’t dropped, it wasn’t abused, it wasn’t left outside for days. The Roam just failed. It’s annoying as hell, but these things happen.
Sonos could have given me a bunch of stick about replacing a $180 speaker,
at the cost of me possibly never spending another dollar with Sonos again.
Or, they could swallow [their cost of] a $180 speaker, all but
guaranteeing that not only will I continue to spend all my too much
money at Sonos, but I’ll also continue to evangelize Sonos to everyone
around me in the market for speakers.
They chose… wisely. I’m glad and thankful they did.
Has anyone told you the good word about Tailscale? If not, I’m here to do it right now. This isn’t “sponcon”[1], but in retrospect, I probably should have given Tailscale a call. 😆
If you have multiple computers in your life — including computer-adjacent things like network attached storage — it’s likely you’d like to have access to each of those devices, always. If I need to inspect a file on my Synology in my house while I’m a passenger in the car, I want to be able to do so.
The easiest way to do this is to expose the port(s) your device needs for remote access through your router/firewall. This way, when someone on the Internet says “I’d like to access information using port 80, please”, your router knows what device should respond.
Unfortunately, this exposes your device to the entire Internet and that’s… undesirable.
Traditional VPNs
The easy solution to this problem is a Virtual Private Network; broadly, this means you run some sort of server inside your network that will allow devices outside the network to tunnel into the network. Once a device is on the VPN — that is to say, tunnelled into your network — it can access anything within that network. Said differently, if your phone is on a VPN that is hosted in your house, then your phone can access all the devices in your house. Most corporate VPNs work this same way.
If you’ll permit some hand-waving and over-simplification, traditional VPNs tend to be a sort of funnel — there is one server running inside the network you wish to tunnel into, and all clients connect to that server. That makes setup easy, but generally, it’s sort of an all-or-none scenario: you’re either on the VPN or you’re not.
What if there was a better way?
Tailscale
Coming back to my initial conundrum — getting files from Synology → phone, what is the actual thing standing in the way of that happening? I need the two devices to be able to talk to each other, no matter what network each device is on. If the phone is on cellular in London and my Synology is on FiOS at home, I need them to be able to communicate. I don’t particularly care how, just that they can.
Tailscale is the how.
Tailscale is a mesh network of all your devices. Each device that is running Tailscale is on your “Tailnet”; every device in your Tailnet can talk to any other device on your Tailnet. This all works by way of fairly common VPN software, extremely clever tricks for poking holes in firewalls, and relay fallbacks when no other approach works.
The net effect is that I’m always able to connect to my Synology. Or my Mac mini. Or my ridiculous assortment of Raspberry Pis. And so on. I can also always connect to my Linode nanode that runs this website. Or a Digital Ocean droplet. I can access any of these devices no matter what network I’m on, and no matter what network the device I’m targeting is on.
It’s ✨ magic ✨.
In Practice
So how does this look, in brass tacks, in my everyday life? Tailscale works by giving every node on your Tailnet additional ways to access it:
- An IPv4 address in the
100.x.y.zaddress range - An IPv6 address
- A bare hostname
- Optionally, a fully qualified domain name
For example, my MacBook Pro that I’m using to write this can be referred to as the following within my Tailnet:
100.12.34.56fd7a:115c:x::y:zblackbook-problackbook-pro.smiley-tiger.ts.net
Naturally, I’ve lightly changed the addresses, because I’m paranoid, but that shouldn’t be necessary: if you’re not on my Tailnet, it should be impossible to access my devices.
So, anywhere that you may have used an address such as 192.168.1.143, you can
instead use 100.12.34.56. Or, even better, you can be IP-agnostic and use
blackbook-pro.smiley-tiger.ts.net. Regardless of what network I’m on, if I
need to access my MacBook Pro, I will find it at blackbook-pro.smiley-tiger.ts.net.
The smiley-tiger.ts.net is my “Tailnet name”, and is a randomly-assigned
pairing of two hyphenated words, with the ts.net suffix.
Who cares?
Perhaps the best way I can sell you on Tailscale is to enumerate why it’s useful to me.
Always-Available Pi-Hole & Swiftbar Widget
I really love Swiftbar, a small utility that lets you add things to your Mac’s menu bar. I use it for a couple of status widgets:
- Is my garage door at home open or closed?
- What is the current count of ATP members
I know neither of these is necessary, but they make me happy.
In the case of the garage door widget, it works by querying a Raspberry Pi in the house that reads a sensor on the door. The Pi will respond with whether or not the door is open. This works great in the house, but when I travel, I can’t access my Raspberry Pi. Well, I couldn’t, anyway. With Tailscale I can. Always. No matter what network my MacBook Pro is on.
Instead of having Swiftbar query 196.168.1.254, I have it query
garagepi.smiley-tiger.ts.net. So no matter how my laptop is connected to the
Internet, as long as I can get on my Tailnet, it will always show the status
of my garage door.
All of the above is also applicable to my pi-hole, which I can now access always, from anywhere. Browsing the web with ads being suppressed via my pi-hole makes for a far more pleasurable browsing experience. Thanks to Tailscale, I can do so even when I’m out and about on my iPhone using cellular. Further, what’s great about using Tailscale to access my pi-hole is that all the web traffic is downloaded over my local connection to the Internet — it’s only the ad blocking (read: DNS queries) that are happening via my Tailnet.
Synology ↔ Synology Backup
I actually have two Synology devices — one that lives in my office and, frankly, is arguably the most important device I own. The other lives at my parents’ house, and serves almost exclusively as a backup destination for the main Synology.
In order to back up from one to the other, I needed to expose a port on my parents’ router/firewall, so my Synology could send data to the remote Synology. This is… fine… but certainly not what I’d prefer. There is no particular need for that device to be exposed to the Internet directly.
Enter Tailscale.
Now that I have both Synologies on my Tailnet, they can simply talk to each other through Tailscale. I’ve removed the port forward on my parents’ router, and the only way to get to my remote Synology is to either be in their house, or be on my Tailnet.
Remote Diagnostics
My dad is a very competent technologist… but he’s also getting older. As the world continues to run at warp speed, it’s understandably harder and harder for him to keep up. Occasionally, he runs into issues he needs my help with.
Though my parents only live about 45 minutes away, that’s not a trek I enjoy making under duress, in order to fix a computing-related issue my dad may be having. Often times, all I need to do is be able to see what he sees, or at worst, briefly control his computer.
At first, it seems obvious that the answer is to add my Dad’s MacBook Air to my Tailnet. While that would work, that’s not what I’d prefer — I shouldn’t need him to run software on the off-chance I need to help him.
Thanks to a combination of Tailscale and “subnet routers”, I can help him without any additional software installations on his part.
One of Tailscale’s advantages is that it is really good at incremental deployment — you can add a node here and there as you see fit. In order to assist in that process, Tailscale has a concept called “subnet routers”, which are bridges between your Tailnet and a network that is not in Tailscale.
I have my remote Synology — the one at my parents’ house — set up as a subnet router. This allows me to jump onto my parents’ network, and connect to any of their devices as though I was in their house.
Thus, I can use screen sharing to log into my Dad’s laptop and help him, when he needs it — with permission of course. No driving nor software installation required.
Selective Internet Egress
What with everything going SSL these days, you could make a strong argument that using public WiFi isn’t as dangerous as it once was. However, I’m paranoid, and I like to protect myself.
When I’m using public WiFi, I vastly prefer to actually enter the broader Internet from a known point — typically my house. This way, the venue where I’m sitting doesn’t get to know what I’m up to. Leaving aside data theft, just the possibility of someone following my footsteps across the Internet makes me very uncomfy indeed.
In addition to subnet routers, Tailscale also has the concept of “exit nodes”. In short, when one of your devices uses an exit node, they will use that as their point of egress onto the Internet.
Whenever I’m out and about, I choose to use one of the devices in my house as my exit node. Generally speaking, that device is actually my Apple TV — yes, really — which is almost certainly sitting otherwise idle. I’ve installed the Tailscale app on my Apple TV to allow for precisely this.
Thanks to using my Apple TV as an exit node, I appear to be inside my house to anything on the broader Internet.
Interestingly, if I ever wanted to appear to be in a different geographic region, I could stand up a tiny/cheap server in another region at Linode, and add that server to my Tailnet as an additional exit node. 👀
Tailscale SSH
Now available broadly, Tailscale SSH allows for quick-and-easy login to servers on your Tailnet, without having to futz about with passing keys around. Like all things Tailscale, it appears to work by way of magic.
For any Linux-based device on your Tailnet, you can opt that device into Tailscale SSH, which means you can instantly log into that device. And thanks to Tailscale favoring direct connections whenever possible, the experience should also be as fast and low-latency as possible.
But Wait, There’s More
I haven’t even spoken about funnels nor Taildrops, both of which have saved my bacon at least once. Seriously; there’s so much here.
Perhaps the coolest thing about Tailscale is that for individual users, in most contexts, it’s absolutely free. I’ve used everything described above, and I haven’t paid Tailscale a cent. Tailscale also has a ton of other features that I’m not using yet — such as sharing devices between Tailnets. There’s so much to unpack here; I’ve only glanced off the outer atmosphere.
Tailscale gets my highest recommendation.
Tailscale did sponsor one episode of ATP, but that was quite a while ago, and they have no idea whatsoever I’ve written this blog post. ↩
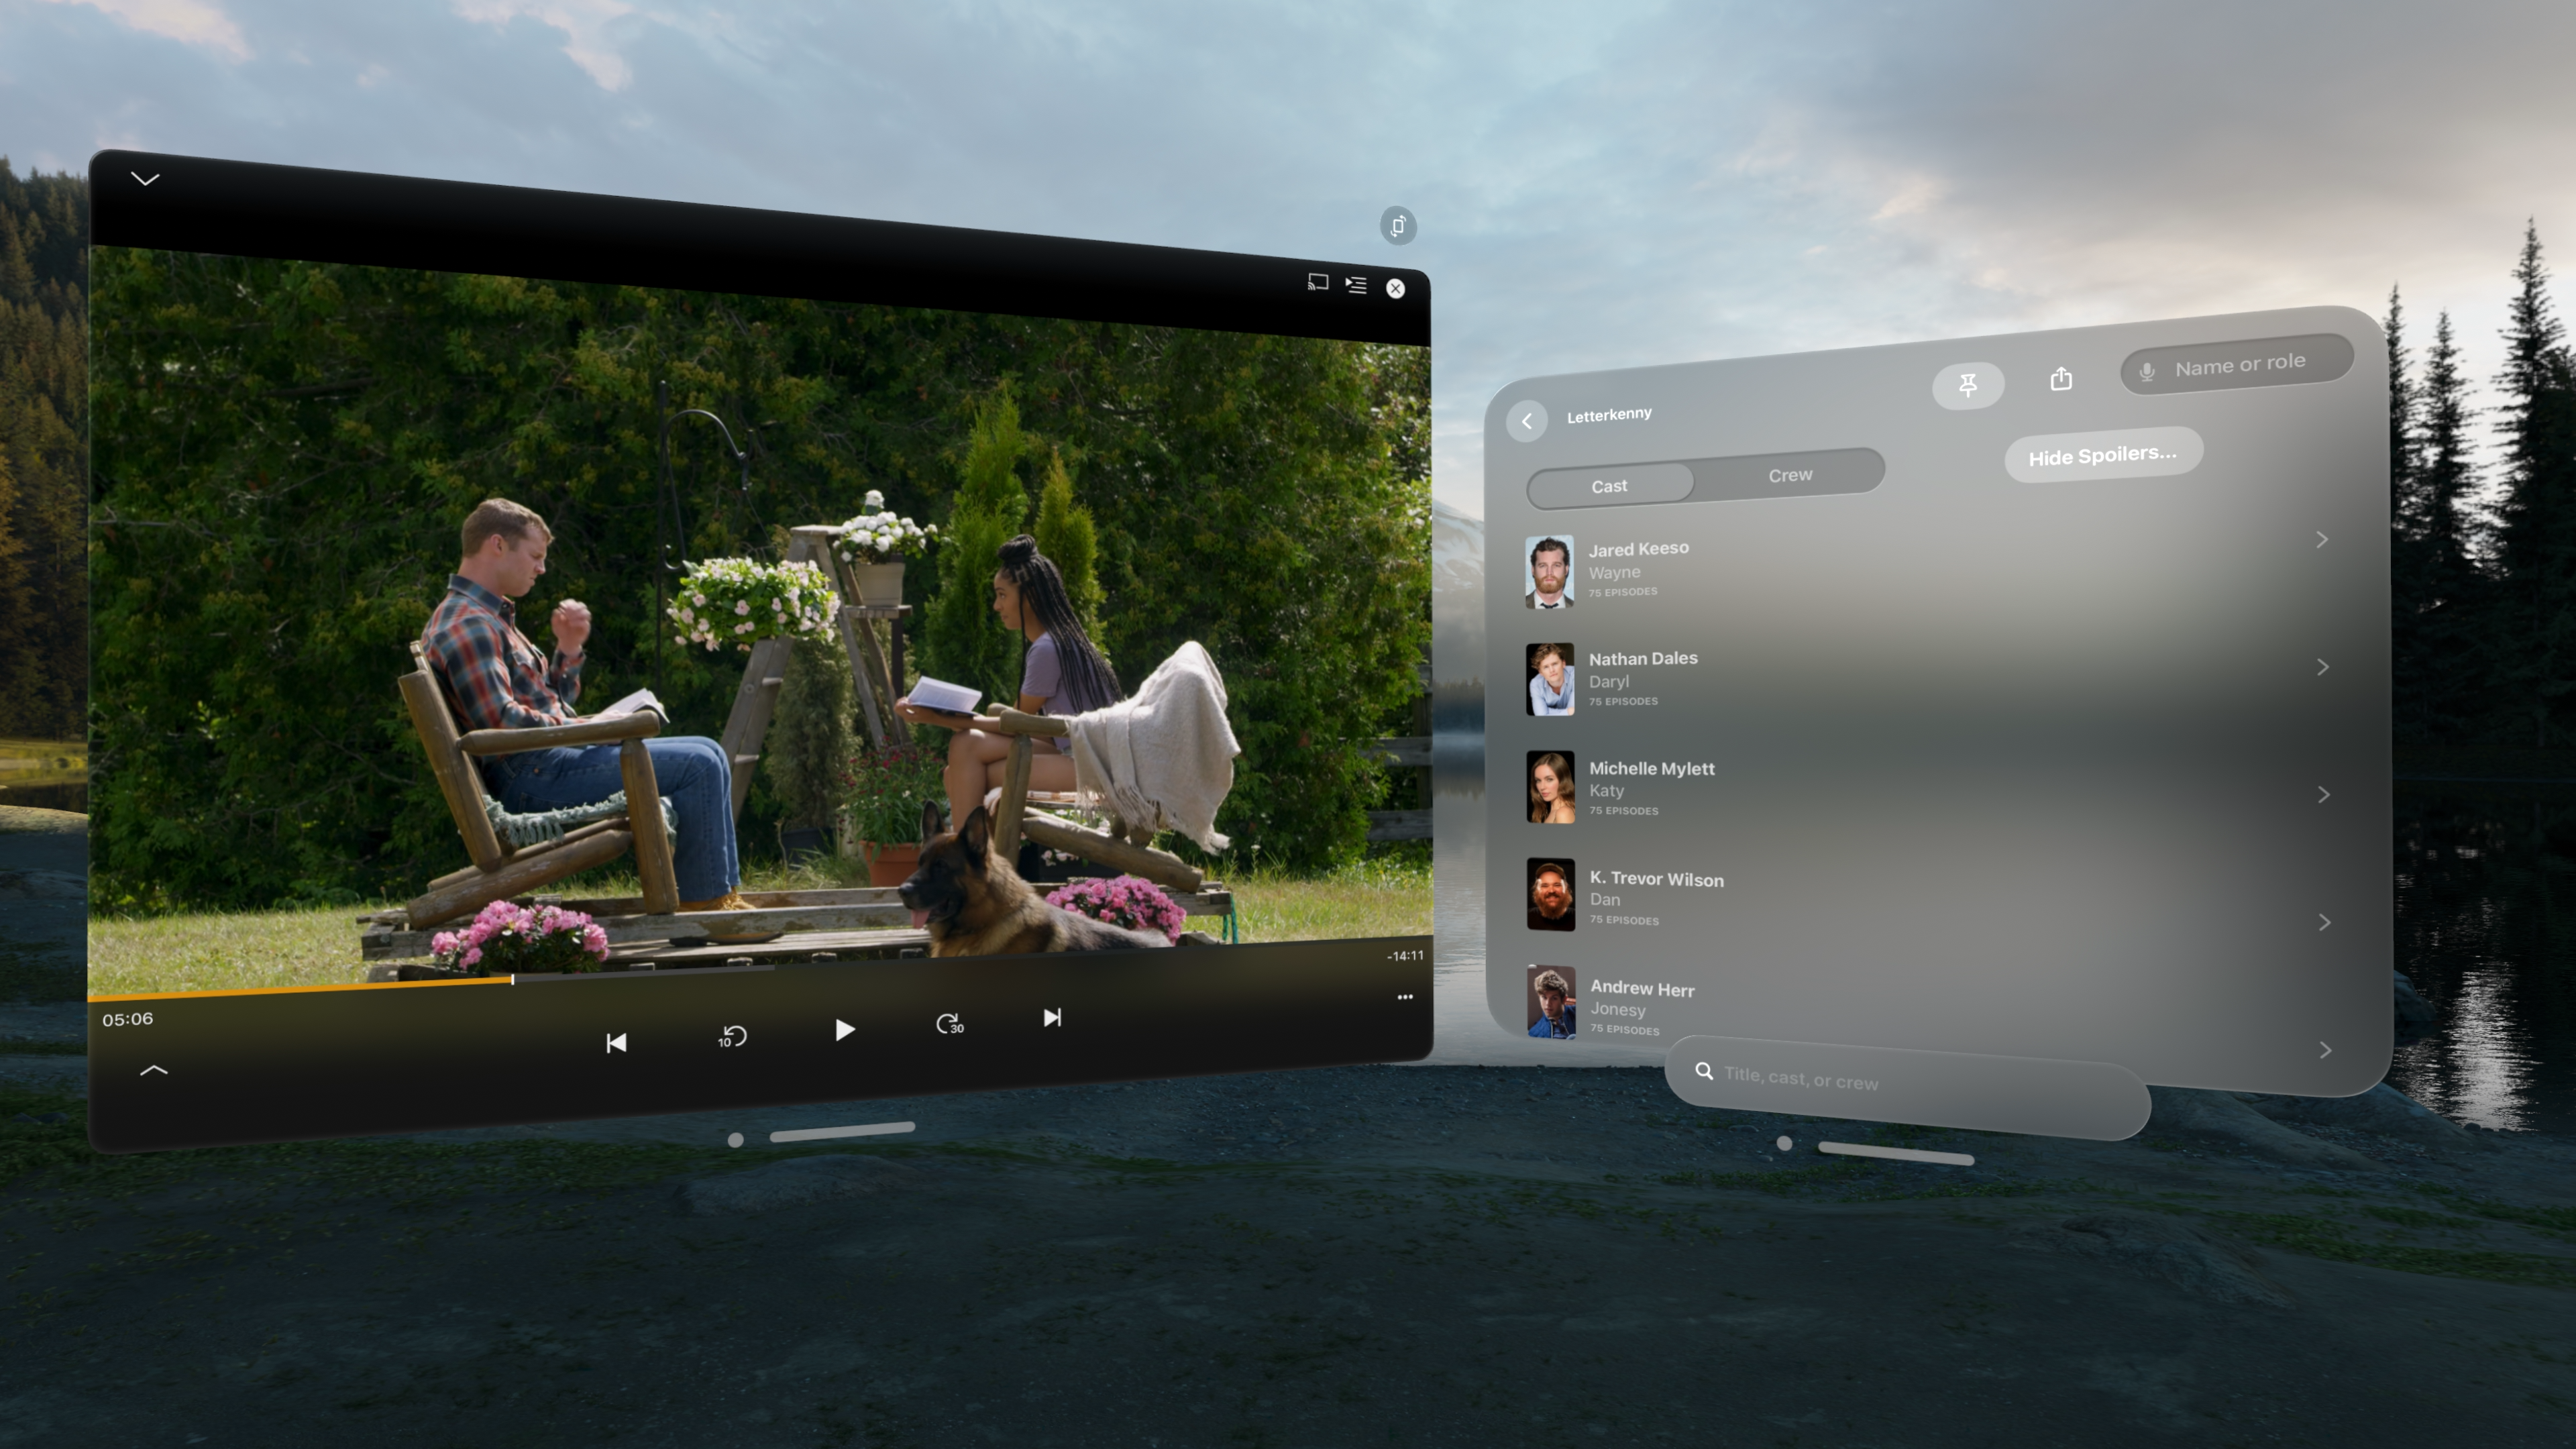
Callsheet is now available on the Vision Pro!
Watching a movie or TV show in the Vision Pro is one of my favorite use cases. Now, you can slide a Callsheet window up next to your media player, all within visionOS. A full dual-screen experience, all within the Vision Pro.
Callsheet for visionOS is fully native. The overwhelming majority of the code is shared between the iOS, iPadOS, and visionOS apps. However, Callsheet is not running in compatibility mode — it’s a full-bore visionOS app.
I’ve taken a pass over the app and made Callsheet a good platform citizen. The visionOS version of Callsheet uses the accent color far more sparingly, uses depth where possible, and embraces background materials where appropriate. I’ve already discovered a couple places where things are awry, but I hope to have a new release in the next couple weeks to fix those oversights.
A couple small caveats, however:
- Because icons are a different shape on visionOS, I’ve promoted one of the alternate icons on iOS — one that is better-suited for a circle — to be the full-time icon on visionOS
- Speaking of icons, it’s not currently possible for users to choose an icon for any visionOS app, so that functionality has been disabled on visionOS.
Perhaps my favorite feature of Callsheet for Vision Pro is that Callsheet for visionOS is not a separate subscription. As always, I try to do right by my users; if you’ve subscribed to Callsheet on any platform, that subscription will carry over to all other platforms.
Though I will always think of Callsheet as iPhone-first, I’m already loving having it available when I’m watching a show or movie in my Vision Pro. If you’re a Vision Pro owner, I suspect you’ll really like it too.
You can grab it from the App Store right now!
In my [likely-futile] quest to unseat James and Shelly as the king and queen of Clockwise, I gratefully accepted Dan’s offer to join guest-host Rosemary Orchard and fellow guest Lisa Schmeiser on this week’s episode.
On the show, we discussed the recently-disbanded Project Titan, generative AI, simple fixes for problems that should be simple (but aren’t), and the 🤢 factor when it comes to using the Vision Pro in public.
Come for the nuanced discussion about an Apple car and AI; stay for me trying to justify using the Vision Pro outside the house. 🫣