Yesterday, Apple announced the iPhone 14 and iPhone 14 Pro. While they added a lot, like satellite connectivity for emergencies, a much improved camera sensor on the 14 Pro, and crash detection.
However, they also took away. From the iPhone 14 Pro specs page:
iPhone 14 Pro and iPhone 14 Pro Max are not compatible with physical SIM cards.
Hm.
My iPhone 13 Pro currently has a physical SIM in it, and though I’d assume Apple would have a plan for upgrades like this, you never really know. This is also complicated because I buy phones unlocked; I wonder if the upgrade path is a little squishier when you’re not replacing an existing device with one locked to your same carrier.
So, in order to hopefully get ahead of the game for next week, I decided to try to convert my physical SIM to an eSIM. As it turns out, this process wasn’t particularly difficult, but I figured it’d be worth documenting for others.
The instructions below will only be useful for my carrier, Verizon Wireless.
First, make sure you’re on both the cellular and Wi-Fi networks, as there is a chance you’ll need to fall back to Wi-Fi at some point during the process.
Next, log into your account. I did all of this on my Mac; I can’t speak for how it’d work on either mobile web or the app.
Once you’re logged in, find your phone, and click Manage device.
On your device page, scroll down and find this section:
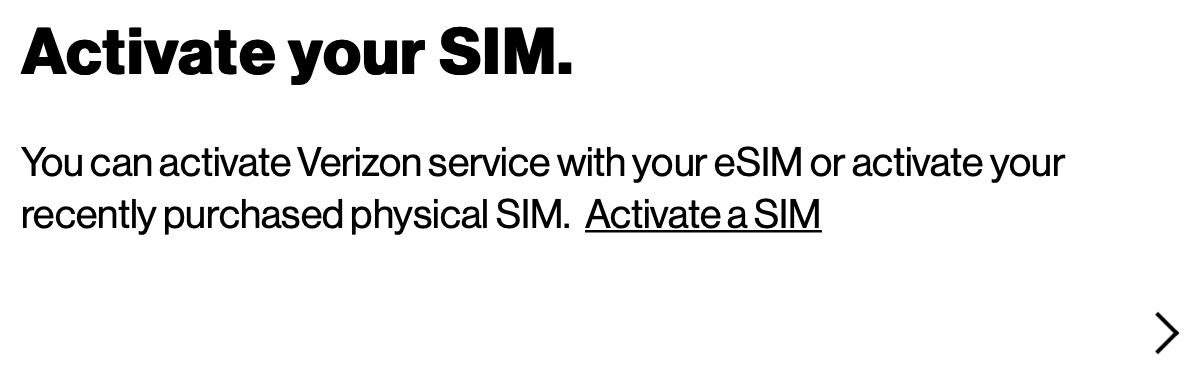
Click Activate a SIM.
At this point, Verizon knew that I had a 13 Pro, and offered for me to use one of the onboard eSIMs:
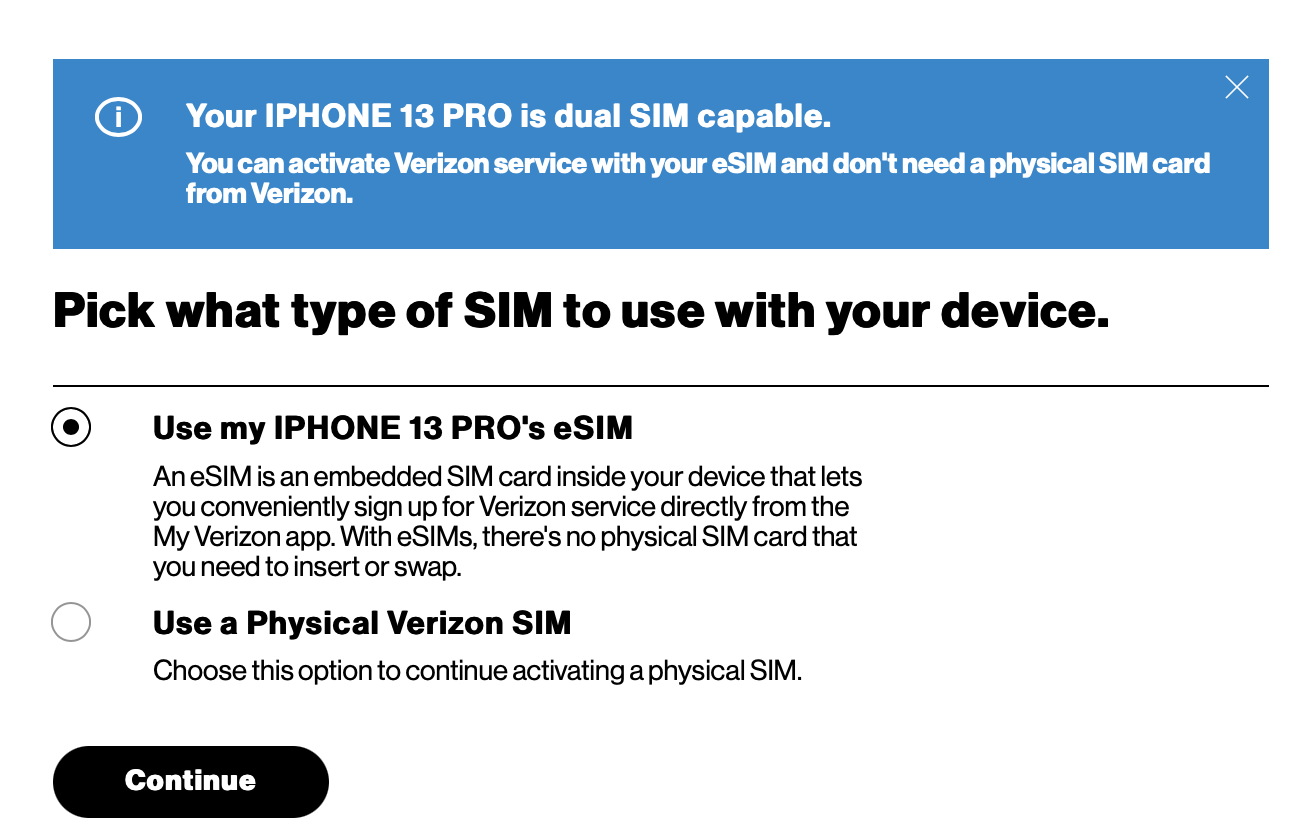
Naturally, I clicked Use my IPHONE 13 PRO's eSIM [sic].
At this point, I was punted to an instructions page, which I didn’t really need to bother with. The rest of the process happened on the phone. I didn’t think to take screenshots of this, unfortunately.
On my phone:
- Open
Settings - Right at the top, I noticed a line that said something like
Finish Setting up Cellular, which I tapped. - At that point I basically followed a wizard that completed the setup
A couple things worth noting:
It took a few minutes for the activation to complete, on a random Thursday morning, before everyone in the world is trying to upgrade their iPhones. I’d estimate maybe 3 minutes?
🚨 BE CAREFUL 🚨
After I did my transfer, I noticed that iMessages were suddenly being sent and received as text messages. This may have been user error on my part, but it seems that my iMessage settings were altered such that my phone number was no longer a valid iMessage address for me.
If you do the above, it’s probably worth verifying your settings. To do so:
- Open
Settings. - Scroll down and tap
Messages. - Tap
Send & Receive. - Verify your phone number is checked. In my case, my email address was checked, but my phone number was not.
- If it isn’t checked, tap your phone number to check it.
It’ll take a minute or so, and then iMessages should start coming back in.
After posting, Leon Cowle reached out via Twitter to provide instructions that seem to have worked for him on AT&T.