It all started with an uncomfortable discovery:
Are PPTP VPNs not available in iOS 10‽
— Casey Liss (@caseyliss) July 17, 2016
(I’m aware of the security concerns, but, bummer.) pic.twitter.com/nTWeTKg1LX
I was previously using a PPTP VPN to allow myself to tunnel into my home network from work or when I’m out. I don’t use the VPN terribly often, but I consider it critical enough that I couldn’t stand to be without it.
Since PPTP is, by anyone’s measure, woefully insecure, Apple has removed it from iOS 10 and macOS Sierra. Thus, I needed to make a change.
I have a Synology DS1813+ (now replaced by the 1815+), which is an absolutely brilliant home server, in addition to being a dumping ground for all my e-hoarding. Among the Synology’s many features is acting as a VPN server. In fact, it was the machine hosting the PPTP VPN server.
The Synology offers two alternatives to PPTP: L2TP/IPSec and OpenVPN. For the former, L2TP is simply a tunneling protocol; IPSec provides the security. For the latter, OpenVPN covers everything, but does not have native, out of the box support on Apple operating systems. To me, that meant it was a non-starter.
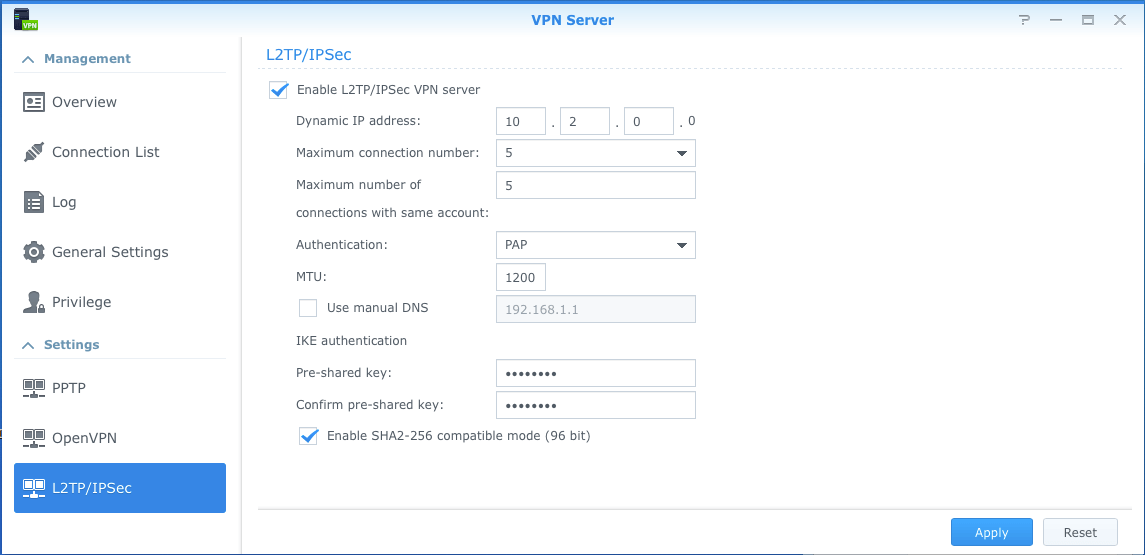
On the Synology side, thanks to the work I had already done, I was able to configure L2TP by checking a checkbox and setting a shared secret. To connect to the VPN, I need not only my user’s account password, but also a shared secret that is, well, shared amongst all users.
That part was easy.
However, I kept having problems connecting from my work MacBook Pro. For the life of me, I couldn’t figure out why, but I felt like it was a firewall issue. I eventually confirmed it to be so by just doing the obvious and attempting to connect to the VPN from within my network.
As noted on Synology’s website, L2TP requires the following ports to be open:
- UDP 1701
- UDP 500
- UDP 4500
However, what isn’t made clear is that some protocols need to be forwarded as well. I discovered this thanks to this very difficult to parse post on the Verizon forums. It seems to me the following protocols also need to be forwarded:
I am a Verizon FiOS user, and because I didn’t know better at the time it was installed in 2008, my internet connection is through a coax line. Though it’s possible to insist to your Verizon installer that they use ethernet to deliver your internet connection inside the house, mine was done over coax, and I don’t want to be bothered changing it.
The only problem that comes of this—which isn’t much of a problem at all—is that I have to use a router that has a coax connection on it. Which means I’m still using the same router that I received in 2008. That said, it operates flawlessly, and has only ever caused me trouble this time, when I attempted to configure the port forwarding rules for L2TP.
The appropriate way to configure the Verizon FiOS ActionTek router for L2TP/IPSec is as follows.
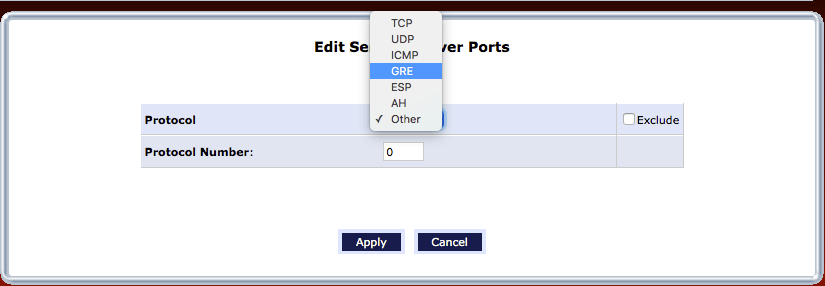
Begin by setting up a new port forwarding rule. Out of the box, the ActionTek comes set up with rules for many (then-) modern services. Setting up a new rule allows for the several ports/protocols to be grouped together as one. However, critically, a port forwarding rule is the only way to forward the GRE protocol.
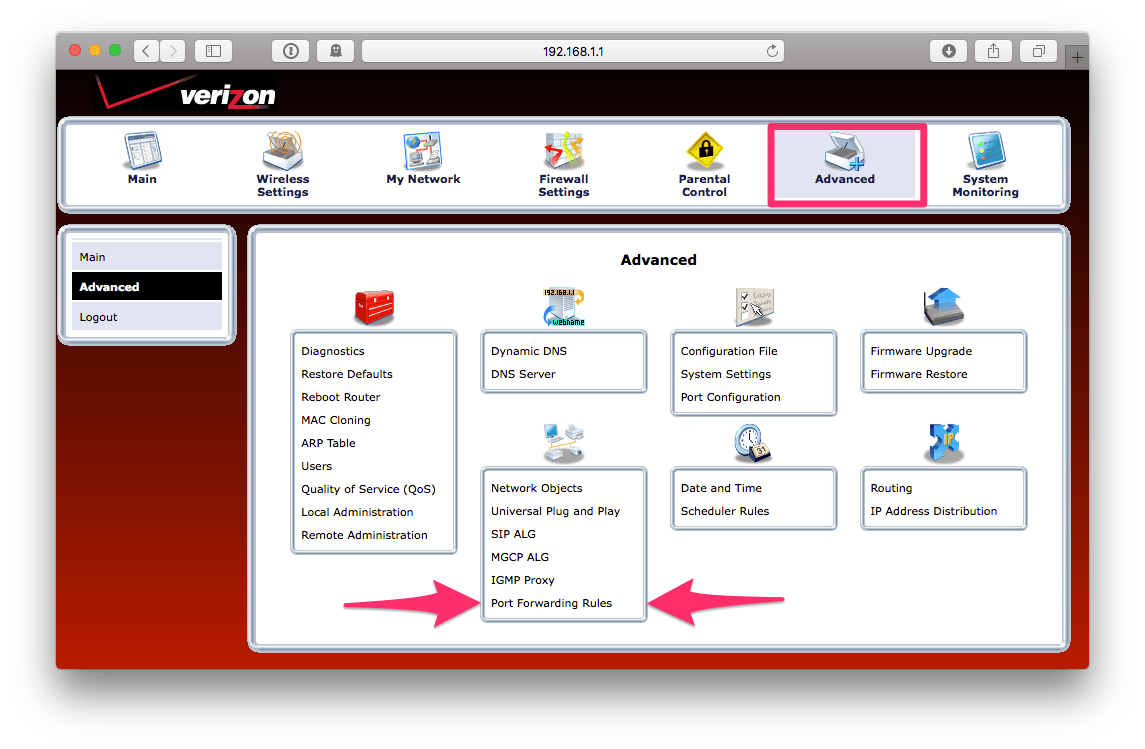
To set up a new port forwarding rule, begin by logging into your router,
likely by pointing your web browser to http://192.168.1.1/. Using the
“tabs” at the top, choose Advanced. In the bottom, you will see
Port Forwarding Rules; choose that:
Here, we will create a new rule. You can do so by scrolling all the way to the
bottom, and finding the little Add link:

Now we can start adding ports and services, much like it works when setting up a normal port forwarding record. Notice that here, we can choose protocols as well as ports (by way of their TCP/UDP protocols):
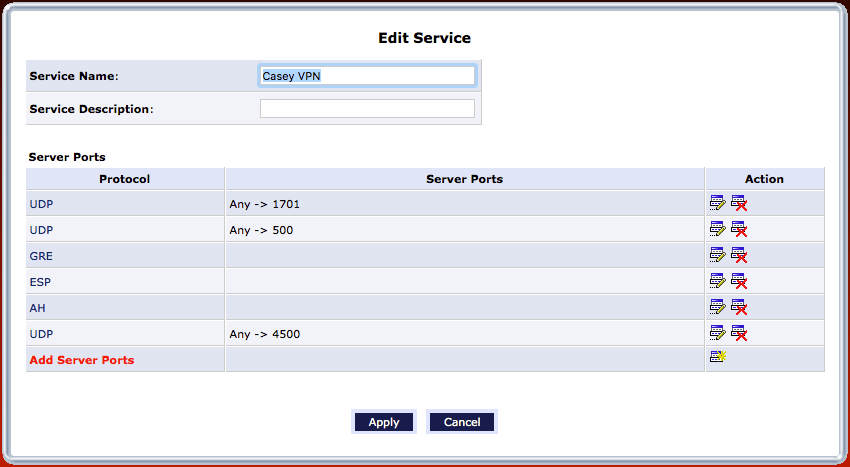
When everything is configured, it should look something like this:
Now this new port forwarding rule can be leveraged, and it can be pointed at
the Synology. In the “tab bar”, choose Firewall Settings and then, on the
left, Port Forwarding. In the leftmost drop down at the top, select the
IP for the L2TP host. In the Application to forward drop down, the new
VPN setting should be an option; in my case, it’s Casey VPN:
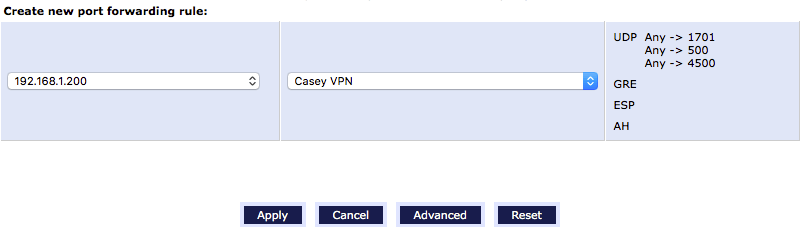
Click Apply, and everything should be all set.
On the macOS and iOS sides, the new VPN connection can be set up as a standard L2TP VPN. Just be sure to enter the shared key and password exactly right.
Now I’m ready for the new operating systems this fall, and as an added bonus, I’m more secure today.