Together, in my RxSwift primer series, we’ve:
- Learned what Rx is all about
- Begun to convert a simple sample app to use Rx
- Eliminated stored state
- Learned how to use a RxCocoa unit
Today, we’re going to tackle something we probably should have been doing all along: unit testing.
A Quick Digression on Unit Testing
Unit testing is, for some reason, a bit controversial. To me, I wouldn’t ship code without decent unit test coverage any sooner than I’d drive without a seatbelt on. While neither can guarantee your safety, both are reasonably low cost ways to improve your chances.
Many iOS developers I know—particularly indies—don’t seem to have the time for unit testing. I’m not in their shoes, so I can’t really argue. That being said, if you have any spare time in your day, I can’t speak highly enough about how helpful I’ve found unit testing to be.
TDD is 🍌 though. No one does that, right?
Architecture Changes
We left things here, with our ViewController looking like this:
class ViewController: UIViewController {

    // MARK: Outlets
    @IBOutlet weak var label: UILabel!
    @IBOutlet weak var button: UIButton!

    // MARK: ivars
    private let disposeBag = DisposeBag()

    override func viewDidLoad() {
        self.button.rx.tap
            .scan(0) { (priorValue, _) in
                return priorValue + 1
            }
            .asDriver(onErrorJustReturn: 0)
            .map { currentCount in
                return "You have tapped that button \(currentCount) times."
            }
            .drive(self.label.rx.text)
            .addDisposableTo(disposeBag)
    }

}
As written, this code works great. Truth be told, there’s a good argument to be made that it isn’t even worth unit testing. However, as with everything in this series, this is just barely enough to allow us to see how we could unit test it.
The first thing we need to do is separate the pieces in that Observable chain.
As written, there’s no easy way to test what’s going on in the ViewController.
A whole discussion could be had about architecture here. I may approach that at a later time. For now, suffice it to say, we’re going to introduce two new types.
Event Provider
The EventProvider is a struct that carries any Observables that are being
emitted from ViewController. These Observables are anything that drive
business logic. In our case, our business logic is the counter, and the
Observable that drives that is the button tap. Thus, here is our entire
EventProvider:
struct EventProvider {
    let buttonTapped: Observable<Void>
}
Presenter
Taking a cue from VIPER, the Presenter is where business logic
happens. For us, that’s as simple as incrementing the count, or really,
the scan. Here’s the entire Presenter:
struct Presenter {

    let count: Observable<Int>

    init(eventProvider: EventProvider) {
        self.count =
            eventProvider.buttonTapped.scan(0) { (previousValue, _) in
                return previousValue + 1
            }
    }

}
The general path of communication is as such:

The ViewController exposes its Observables to the Presenter by way of the
EventProvider. The ViewController enrolls in Observables that are Properties
on the Presenter itself.
Aside: Alternatively, you could choose to have the Presenter emit a
ViewModel that encapsulates the entire state of the view. For simplicity,
I’m just emitting the count by way of an Observable<Int> exposed on the
Presenter.
Here is our revised ViewController that takes advantage of the new Presenter
by using an EventProvider:
class ViewController: UIViewController {

    // MARK: Outlets
    @IBOutlet weak var label: UILabel!
    @IBOutlet weak var button: UIButton!

    // MARK: ivars
    private let disposeBag = DisposeBag()
    private lazy var presenter: Presenter = {
        let eventProvider = EventProvider(buttonTapped: self.button.rx.tap.asObservable())
        return Presenter(eventProvider: eventProvider)
    }()

    override func viewDidLoad() {
        self.presenter.count
            .asDriver(onErrorJustReturn: 0)
            .map { currentCount in
                return "You have tapped that button \(currentCount) times."
            }
            .drive(self.label.rx.text)
            .addDisposableTo(disposeBag)
    }

}
The real differences are the addition of lazy var presenter and the
implementation in viewDidLoad(). We’re storing the presenter as a property
so it never falls out of scope until our entire ViewController does. We’re
using a lazy property so that we don’t have to make it optional, but can
still create it after init time.
The chain in viewDidLoad() is mostly the same as we had seen before, except
that we are using the presenter’s count property to drive everything. A way
to diagram this out is:
ViewController.button.rx.tap drives
EventProvider.buttonTapped, which drives
Presenter.count, which drives
our map and Driver, which drives
ViewController.label.rx.text
Everything is wired up as we expect, if slightly less linearly. Since I’ve been using an architecture similar to this at work for months, this reads very clearly to me now. If you’re scratching your head, that’s not unreasonable at this stage in the game. Nonetheless, by using an architecture like this, we now have separated our concerns:
- The view controller is simply in charge of maintaining the user interface
- The presenter is in charge of business logic
- The event provider is what will need to be faked
Now we know what we need to unit test: the Presenter.
Unit Testing Observables
Remember what I said about Observables way back in part 2:
At the end of the day, just remember that an
Observableis simply a representation of a stream of events over time.
It’s the end that makes things a little bit dodgy:
stream of events over time
How do we represent that in a unit test, that’s supposed to run and return
immediately? Clearly, we need a way to fake signals on input Observables
(like our EventProvider) and a way to capture the results on output
Observables (like our Presenter).
Preparing for Unit Testing
Thankfully, RxSwift has a peer that we can take as a dependency only for the purposes of testing: the appropriately named RxTest.
Let’s amend our Podfile; I’m showing only the relevant portion:
  # Pods for RxSwiftDemo
  pod 'RxSwift'
  pod 'RxCocoa'

  target 'RxSwiftDemoTests' do
    inherit! :search_paths
    # Pods for testing
    pod 'RxTest', '~> 3.0'
  end
Once we do a pod install, we have some new features available to us. Most
notably, TestScheduler.
Creating our Unit Test
A TestScheduler allows you to fake one or more Observables by defining
at what time they should signal, and what those signals should be. The unit of
measure for “time” is largely irrelevant; the tests will run as fast as the host
machine allows.
In order to unit test our Presenter, we will create a fake Observable that
we will feed into our EventProvider. This will, in turn, get fed into our
Presenter. Since we know exactly how this fake Observable will signal, we
can know exactly how the resulting count from the Presenter should signal.
We’ll create a new unit test class, and we’re going to store two instance
variables within it: a DisposeBag and this new TestScheduler. We will also
reset them between each test in the class, to ensure each test starts from a
clean slate. So our test class looks like this, with imports included for
reference:
import XCTest
@testable import RxSwiftDemo
import RxSwift
import RxTest

class RxSwiftDemoTests: XCTestCase {

    var disposeBag = DisposeBag()
    var scheduler: TestScheduler!

    override func setUp() {
        super.setUp()
        self.scheduler = TestScheduler(initialClock: 0)
        self.disposeBag = DisposeBag()
    }
}
Now we need to leverage the scheduler. Let’s create a test case.
In the test case, we will have to follow these steps:
- Create a hard-coded list of events to drive the faked
buttonTappedstream - Create an
Observerto observe the results of thecountstream - Wire up our
EventProviderandPresenter - Wire up the
Observer - Run the scheduler
- Compare the results to what we expect
Let’s take a look at each step:
Create a Fake Stream & Observer
To create the fake stream, we’ll use our TestScheduler’s ability to create an
Observable. We have to choose between a hot and cold observable, which is a
whole other topic[1], but just rest assured that hot will generally be a fine
choice, especially for UI-sourced streams. We’ll fake it by specifying what
events happen at what times:
let buttonTaps = self.scheduler.createHotObservable([
    next(100, ()),
    next(200, ()),
    next(300, ())
])
This can be approximated using this marble diagram:
---[@100]---[@200]---[@300]--->
Basically, at time 100, time 200, and time 300, we’re simulating a button tap.
You can tell because we’re doing a next event (as opposed to error or
complete) at each of those times.
Now we need something to observe the result stream. We don’t need the actual stream we’re observing yet; we simply need to know what type it is:
let results = scheduler.createObserver(Int.self)
Later, we’ll use that results observer to interrogate what values were signaled
on the Presenter’s count: Observable<Int>.
Wiring Everything Up
This portion is standard unit testing: pass your fakes into your objects under
test. For us, that means passing our buttonTaps observable into a new
EventProvider, and then passing that into a Presenter:
let eventProvider = EventProvider(buttonTapped: buttonTaps.asObservable())
let presenter = Presenter(eventProvider: eventProvider)
Running the Scheduler
Now we need to actually run the scheduler, which will cause the buttonTap
stream to start emitting events. To do so we need to do two things. First,
we ensure that we’re capturing what’s emitted by the Presenter in our Observer:
self.scheduler.scheduleAt(0) {
    presenter.count.subscribe(results).addDisposableTo(self.disposeBag)
}
Note that we’re scheduling this enrollment at time 0. Given the way we’ve set
up buttonTaps, we can do this any time before time 100. If we do it after
time 100, we’ll miss the first event.
Now, we actually tell the scheduler to run:
scheduler.start()
Testing the Results
By this point, the scheduler will have run, but we still haven’t tested the
results. We can do so by comparing what’s in our Observer to a known expected
state. Note that the expected state happens at the same times as our faked
buttonTaps, but the values are the results of the scan operator:
let expected = [
    next(100, 1),
    next(200, 2),
    next(300, 3)
]
Now, thanks to an overload provided by RxTest, we’ll do a normal XCAssertEqual
to confirm the results match what we expected:
XCTAssertEqual(results.events, expected)
Let’s look at the whole thing all together:
func testPresenterCount() {
    let buttonTaps = self.scheduler.createHotObservable([
        next(100, ()),
        next(200, ()),
        next(300, ())
    ])

    let results = scheduler.createObserver(Int.self)

    let eventProvider = EventProvider(buttonTapped: buttonTaps.asObservable())
    let presenter = Presenter(eventProvider: eventProvider)

    self.scheduler.scheduleAt(0) {
        presenter.count.subscribe(results).addDisposableTo(self.disposeBag)
    }
    scheduler.start()

    let expected = [
        next(100, 1),
        next(200, 2),
        next(300, 3)
    ]

    XCTAssertEqual(results.events, expected)
}
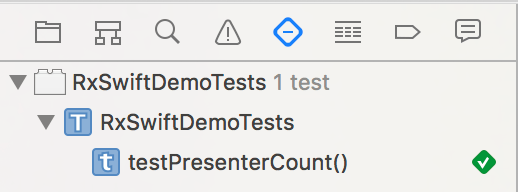
A quick ⌘U to run the test, and we see what we hoped for:
You can see the final version of this code here.
Now, feel free to modify buttonTaps, expected, or the time we used in
scheduleAt() to see how tests fail. Also pay attention to the Console output,
as it does a good job of showing the difference between expected and actual.
Wrapping Up
My RxSwift Primer is, for now, complete. We’ve learned:
- What makes Rx appealing
- How to convert imperative code to reactive
- How to eliminate stored state
- How to leverage RxCocoa units
- How to unit test
You now have all the tools you need to start writing your own code using RxSwift. For more help with Rx, I recommend:
Rx has made my code better in almost every measure. I’m really glad to have been introduced to it, and I can’t really imagine writing code any other way. Even though it’s a steep learning curve, and it requires rewiring your brain to think about problems differently, the juice is well worth the squeeze.
Good luck!
Acknowledgements
My thanks to Daniel “Jelly” Farrelly for pushing me to write this series, and for doing first-pass edits. You can hear Jelly and I discuss RxSwift on his now-complete podcast, Mobile Couch, on episode #93.
My thanks to Jamie Pinkham for introducing me to RxSwift, and for doing the technical edits on each of these posts.
Observablescan be either hot or cold. ColdObservables do not emit events until they are subscribed to. This is the default behavior for mostObservables. HotObservables will emit even if there are no subscribers. UI elements are examples of hotObservables: just because no one is listening for a button tap doesn’t mean it didn’t happen. You can find more details in the RxSwift documentation. ↩