I have a confession to make:
I’m a monster.
I’m a monster who occasionally buys movies on optical disc.
In 2019, that’s probably a stupid thing to do. I’m a man of habit, and like good reflexes, they die hard.
A friend of mine was recently asking me how I ripped optical discs for use in Plex. The process is pretty easy, but has a couple of potential gotchas.
In broad strokes:
- Get the video off the disc and store it as a
MKVfile. - Compress it in such a way that any normal human won’t be able to tell the difference between the original and the compressed file.
MKVs are nice because they’re generic containers that can hold
pretty much any kind of audio or video content. Since there are
no restrictions about the kinds/codecs of content in a MKV, it
is a great choice of container; whatever is on the disc can be
stored within a MKV.
However, as we’ll learn later, for long-term storage, I actually prefer something different.
Setup
- Get yourself a DVD or BluRay player.
There are many, many options for external drives that plug into your computer via USB. I bought a really cheap one that, unsurprisingly, was a piece of garbage. I replaced it with this Pioneer drive which is excellent. - Download MakeMKV.
It’s available for both macOS and Windows. - Pay for it.
It’s a great app, and at $50, it’s as much as a couple of BluRays. - Install it. Note that on macOS, MakeMKV isn’t appropriately
signed, so the first time you run it, you’ll need to find it
in
/Applications, right-click on it, and selectOpen. - Plug in your drive, place the disc in it, and run MakeMKV.
Rip: Easy Mode
- When you run MakeMKV, the first step is to scan the disc and see what’s on it. You do so by clicking the huge icon on the left:
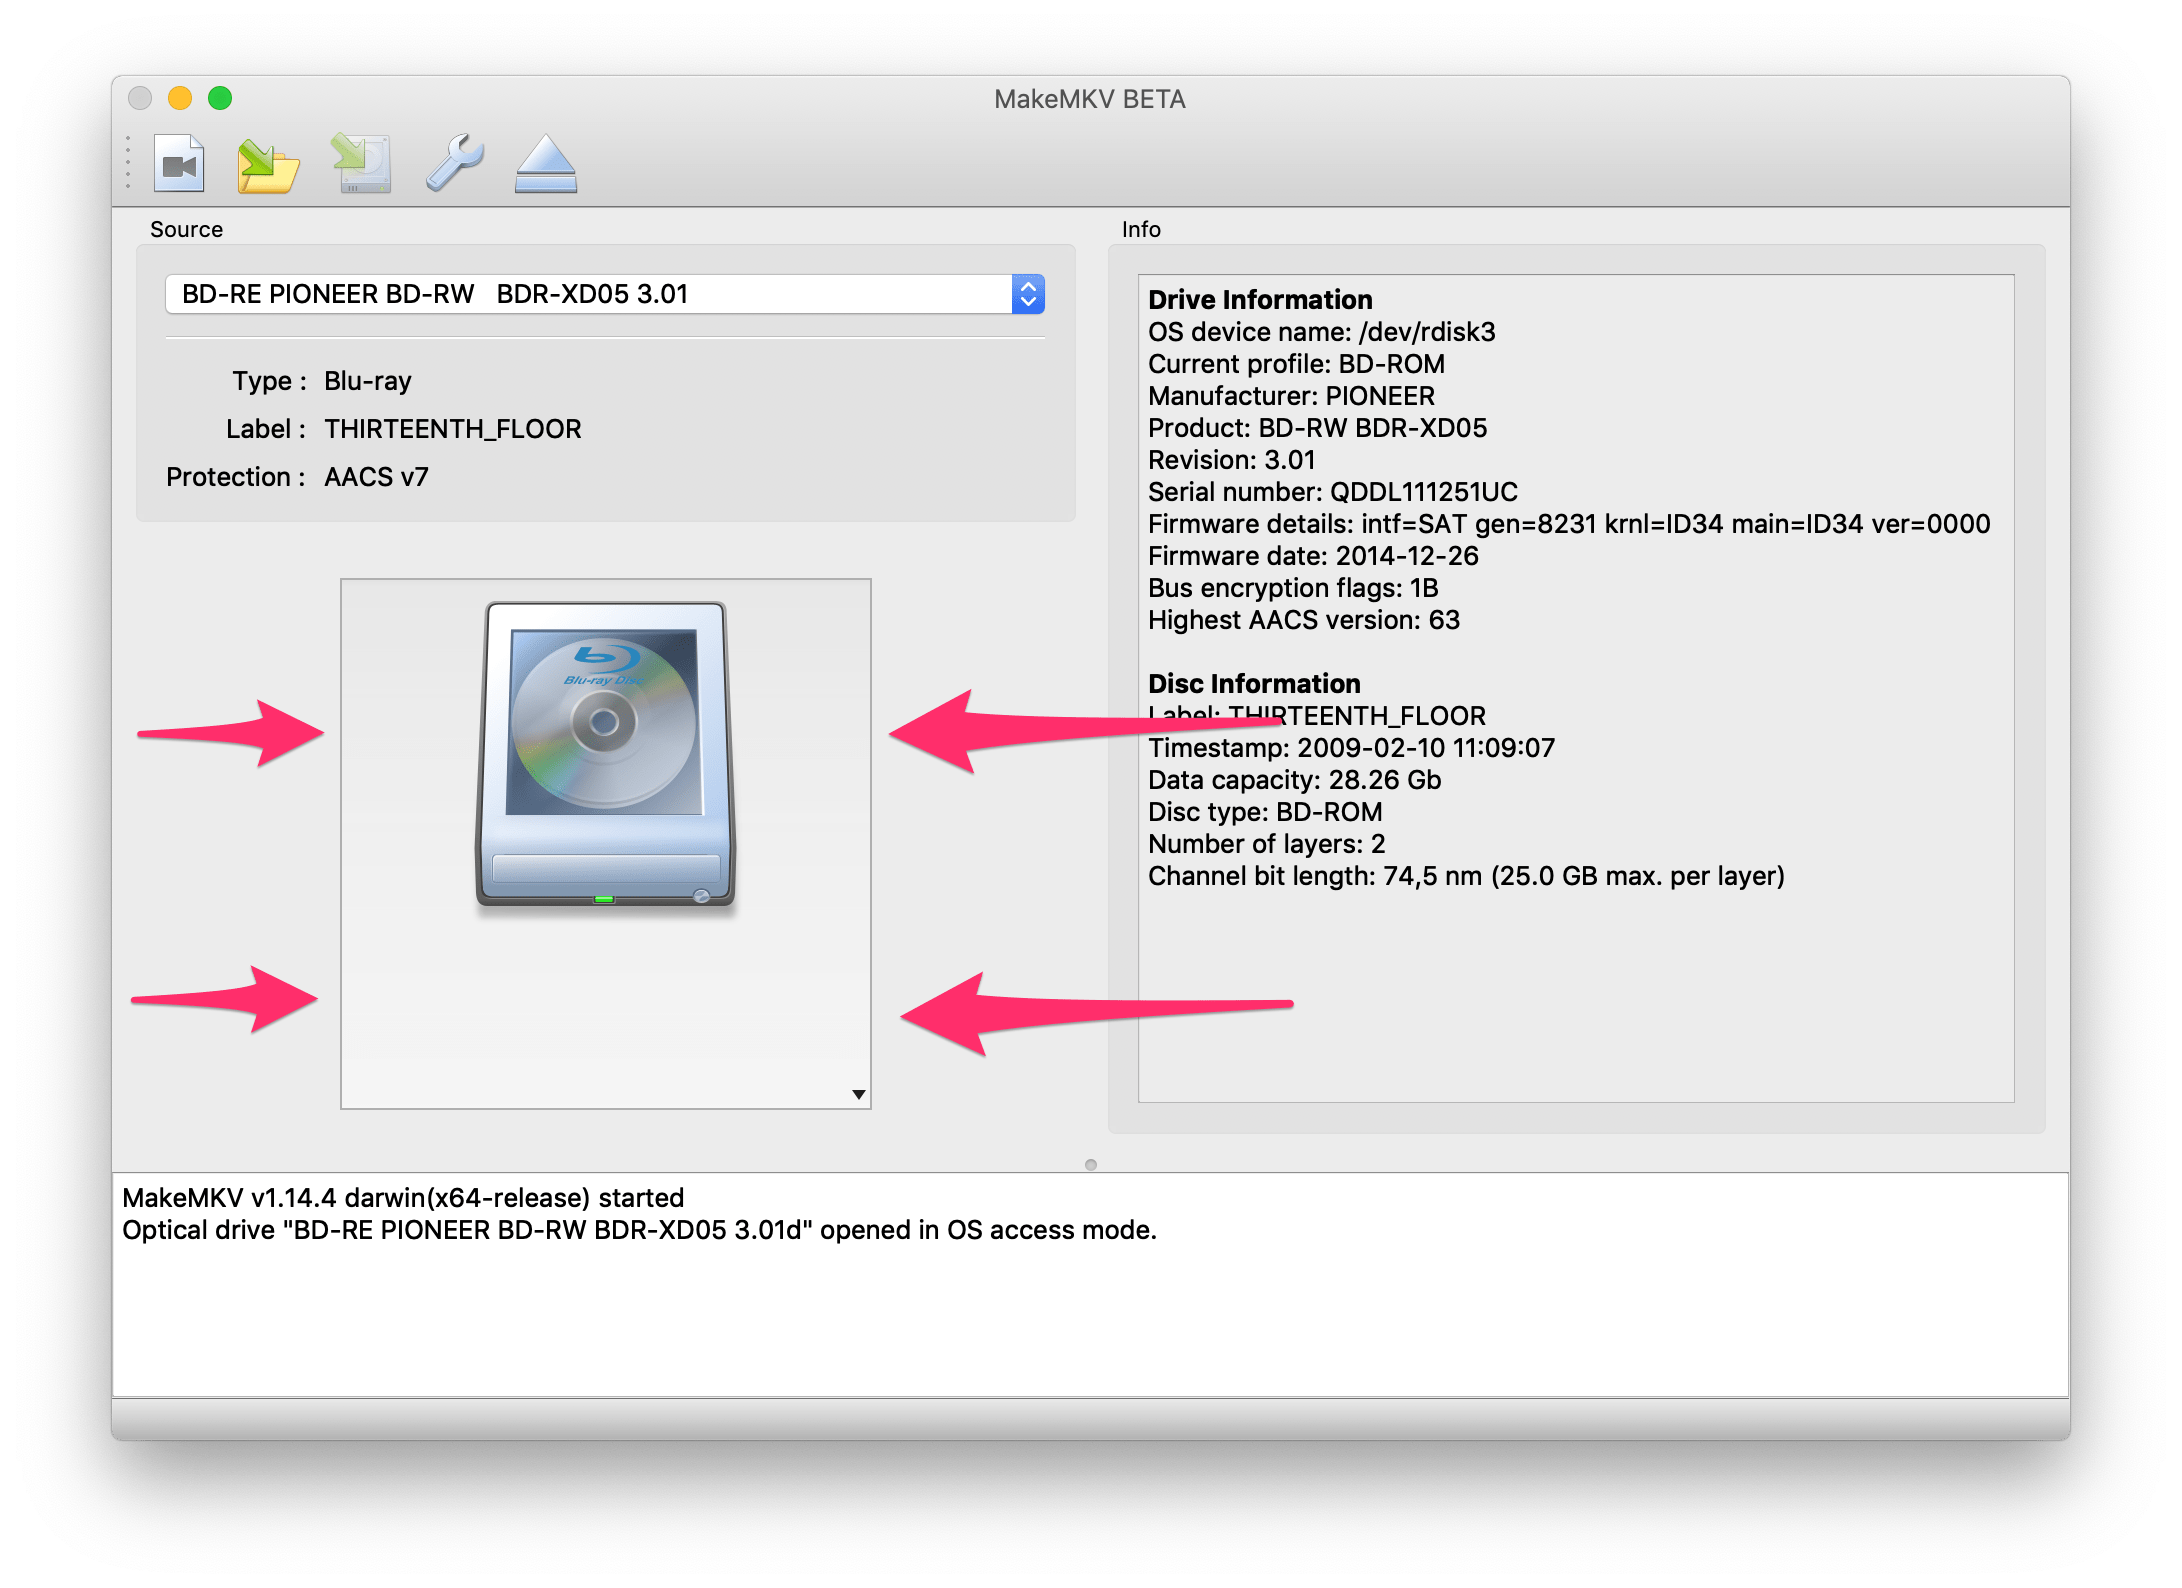
- Once you tap the icon, MakeMKV scans what’s on the disc and will present you with a list of titles, and within each title, chapters.
- If things go according to plan, and if you’re ripping a film,
it should be quite easy to figure out which title to rip. It
will be the one which is largest; usually 4GB+ for DVDs and
20GB+ for BluRays.
If you see more than one option, we’ll cover that later.
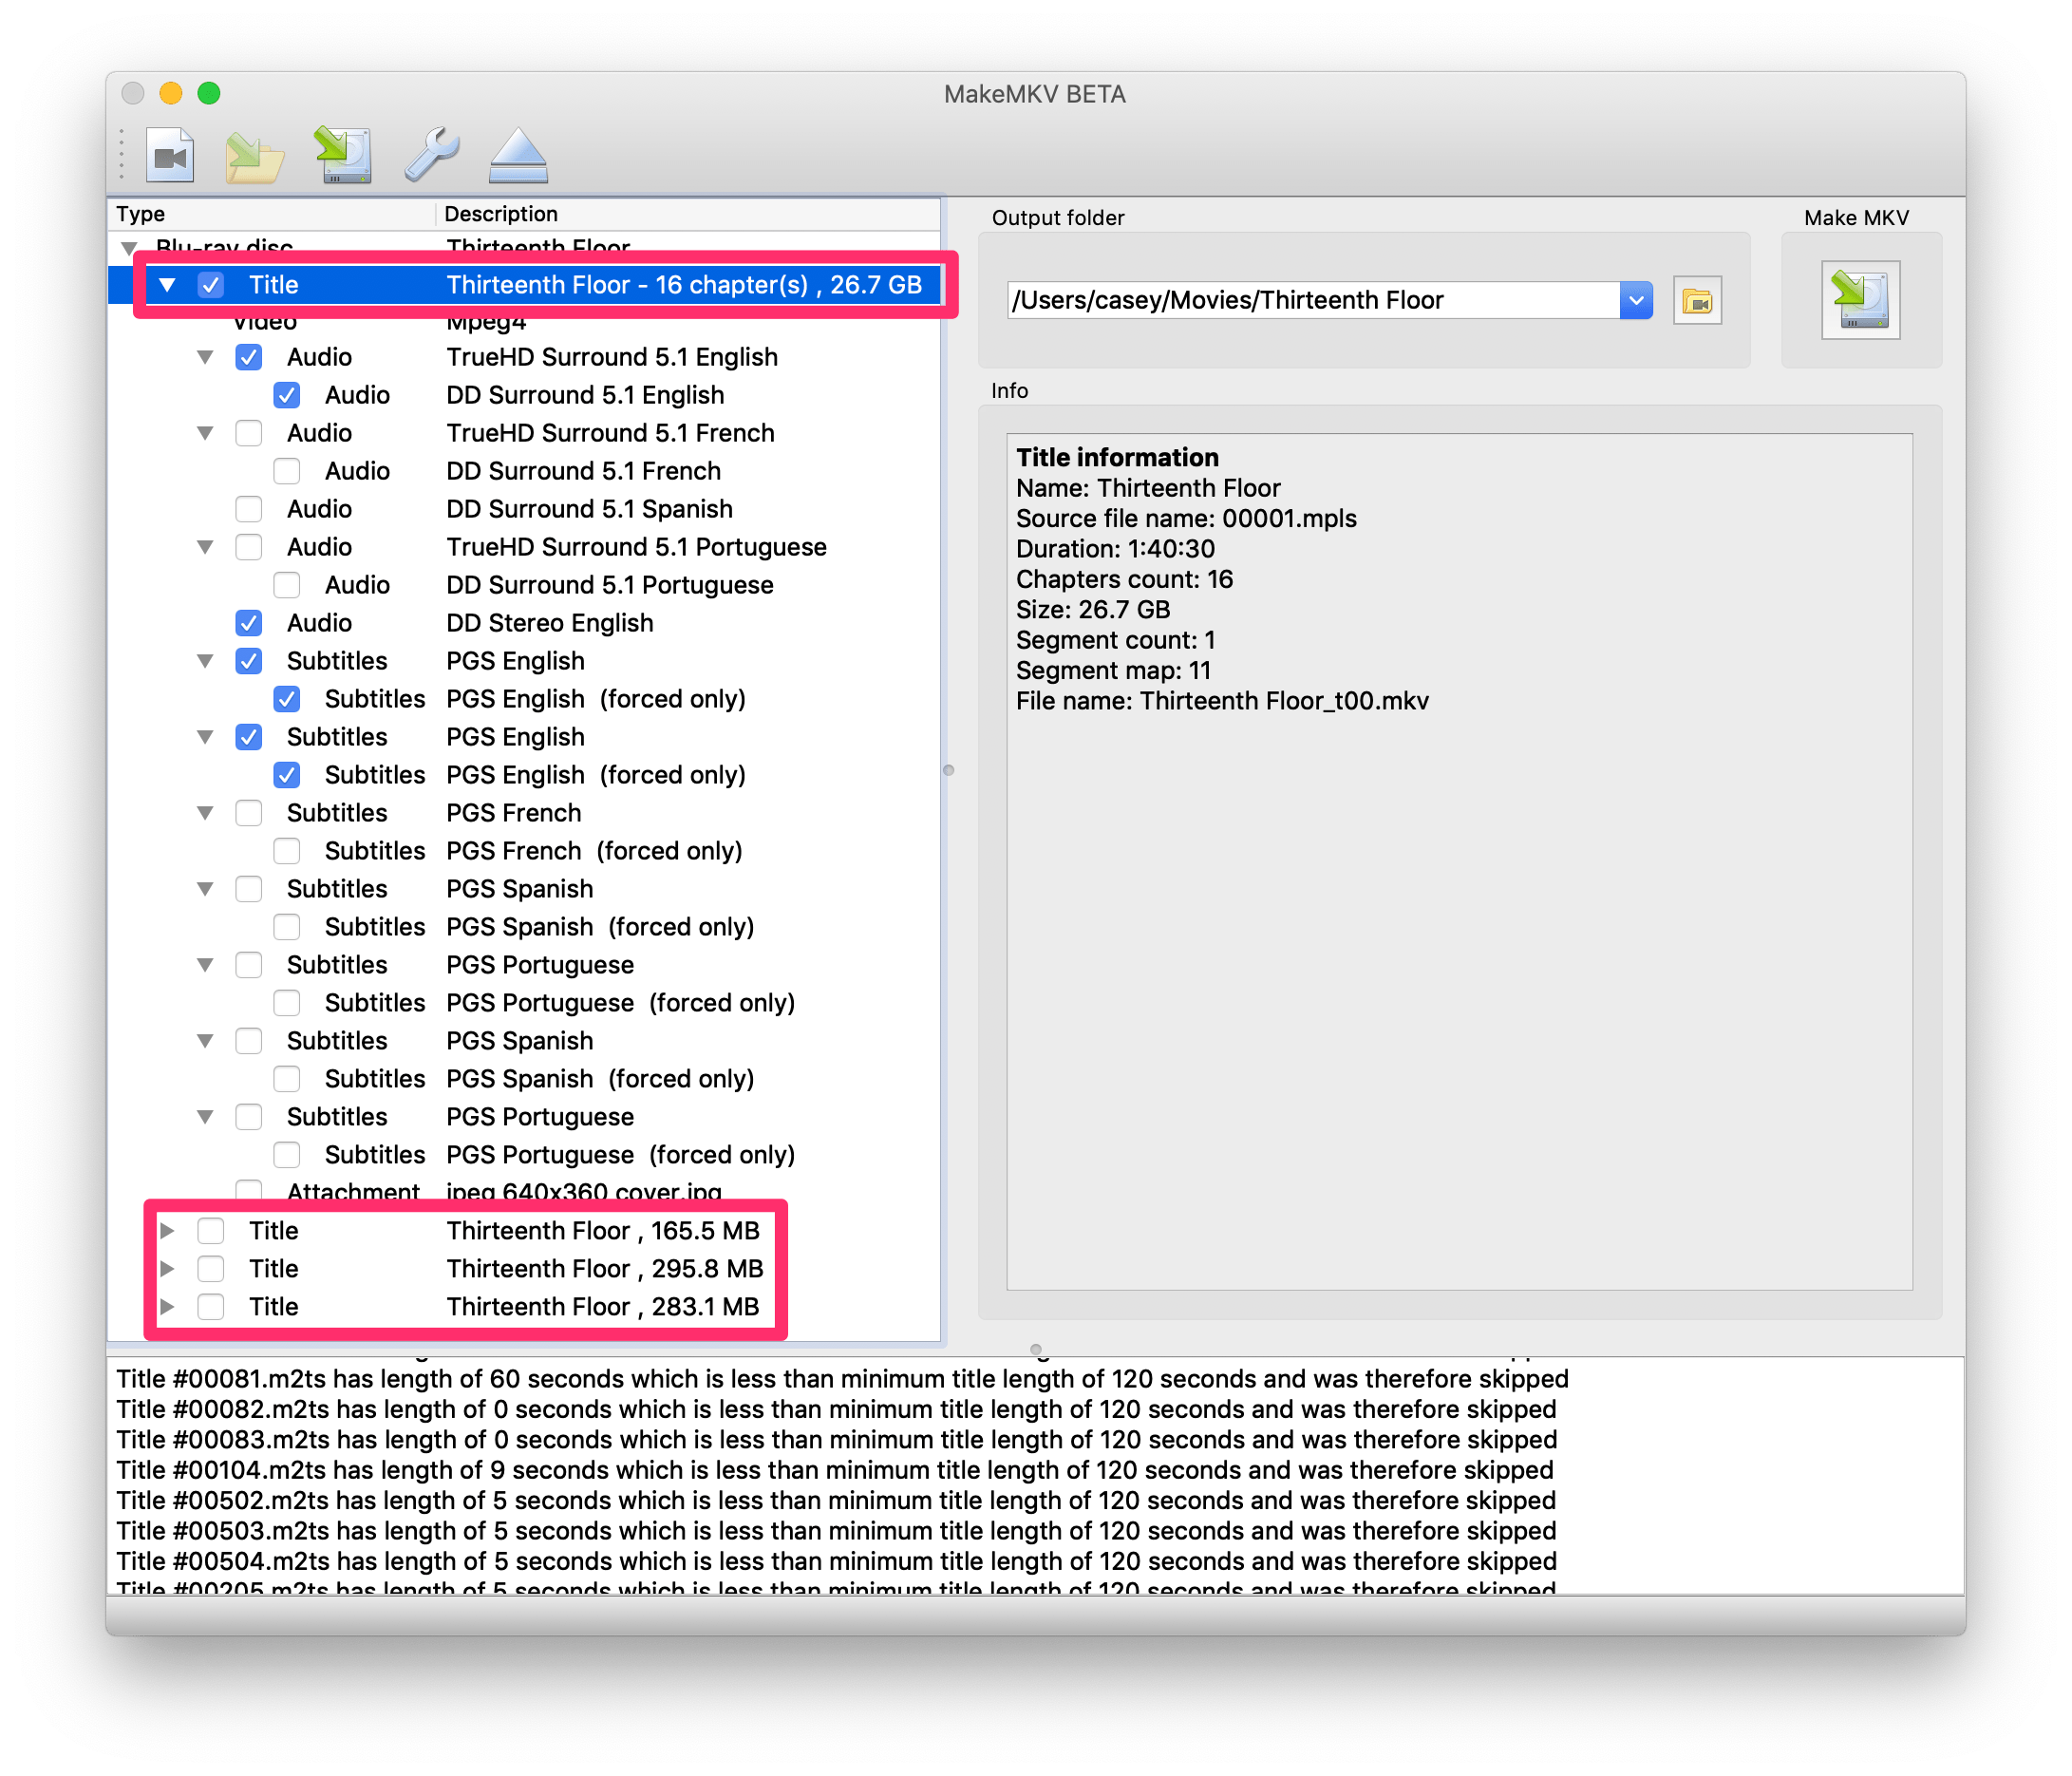
- Once you discover which title you want to rip:
- You’ll probably want to un-check all the other titles on the disc, as you probably don’t want to rip those.
- For the title you do want, you’ll probably want to un-check any of the subtitles or audio streams you don’t want. I typically find I’m un-checking Spanish and French on most discs.
- Set the path for the
MKVfile that MakeMKV generates, and then click the icon on the right. This will copy the disc to your computer.
Rip: Hard Mode
Depending on the disc, things can get pretty dodgy when it comes to picking which title to rip. Sometimes you can run into scenarios like this one:

Notice that two different titles are both effectively the same size: 34.4 GB.
Sometimes this is a language issue: even though one title can hold multiple languages of audio, or even subtitles, sometimes films will have different editions to change languages of text shown on screen. Things like signs, titles shown on-screen, etc. Animated films, like those made by Pixar, tend to do this quite a lot with on-screen signage.
However, many times, multiple [near-] identically sized titles are a rudimentary form of copy protection. Often times there is one clear winner, and a bunch of fakes that, when played back, aren’t quite right.
So, what’s the solution?
My first approach is to do a search; sometimes you can find a
forum post that answers the question. When you do find a post that
answers the question, it will be answered in the form of a mpls
to rip. An example could be 00800.mpls.
If your search comes up empty, you could try to play the disc
and see if your playback software/device will tell you what
mpls it’s playing. In my experience, that’s not something most
players will tell you.
Alternatively, you can take the brute-force approach, which is what I usually do: rip everything and just try playing them. I take a look for on-screen text and forced subtitles. I also scrub through the file and make sure it looks, at a glance, like everything happens in the correct order.
Whichever one is in English, and seems to have all the right stuff in the right place, is the winner.
Compression
At this point, you could choose to stop. The MKV that
MakeMKV has created is perfectly playable by most software,
such as Plex or IINA. However, these files are
not compressed, and thus they are huge. Our example
above was ~35 GB.
Personally, even though I do have a massive NAS, I’d rather compress these files a bit for storage.
Enter Don Melton’s fantastic video transcoding tools.
You may know Don as the father of the Safari web browser, but in his retirement, he’s kept his hands busy by writing a suite of incredibly good tools to help transcode and compress video.
In my experience, after running a video through Don’s tools, there is virtually no degradation in quality, despite the output file being 10-20% of the size of the original.
Don’s scripts do use the command line, and the installation can be a little bit fiddly. Installation is left as an exercise for the reader, but once you get everything installed, usage couldn’t be simpler:
transcode-video file-that-makemkv-created.mkv
That being said, I do prefer to provide a couple of options. So,
let’s say I had a file avengers.mkv. I would run that file
through Don’s tools as such:
transcode-video --mp4 --burn-subtitle scan avengers.mkv
The two options:
--mp4 indicates that I want the resulting output to be a
MP4 file, rather than another MKV. This tends to play
better with Apple devices, which is what I use to play these files.
--burn-subtitle scan is a little bit more nuanced. In some
films, foreign-language content spoken on-screen will be displayed
in English by forcing the subtitles to show during that time,
even if subtitles haven’t been turned on by the user. A great
example of this is The Hunt for Red October, when Russian is
spoken on-screen.
--burn-subtitle scan indicates to Don’s tools that they should
attempt to scan for any forced subtitles, and then burn them
into the video, so they’re part of image shown on-screen. As
Don writes in his instructions:
By default, the transcode-video tool automatically burns any forced subtitle track it detects into the output video track. “Burning” means that the subtitle becomes part of the video itself and isn’t retained as a separate track. A “forced” subtitle track is detected by a special flag on that track in the input.
You can also use a special “scan” mode […] to find any embedded forced subtitle track that’s in the same language as the main audio track.
Be aware that using this special “scan” mode does not always work. Sometimes it won’t find any track or, worse, it will find the wrong track. And you won’t know whether it worked until the transcoding is complete.
Personally, I find it infuriating when I try to watch a movie
but the subtitles weren’t properly burnt in. To me, it’s worth
using --burn-subtitle scan on anything that has some foreign
language content. You may feel differently.
I’ve only recently gotten in the habit of instructing Don’s tools to burn in subtitles, but they haven’t failed me… yet.
Fin
The transcode-video process will take quite a while. When it’s
done, you’ll end up with a single file that has a compressed
version of the disc you started with. By
naming the file appropriately, you can easily add it to
Plex, where all the relevant metadata will be added automatically.
Now, you can watch your movie immediately, without having to sit through 2 minutes of FBI warnings and a ridiculous menu. Imagine that.